How to Install Roofing Paper: A Complete Guide
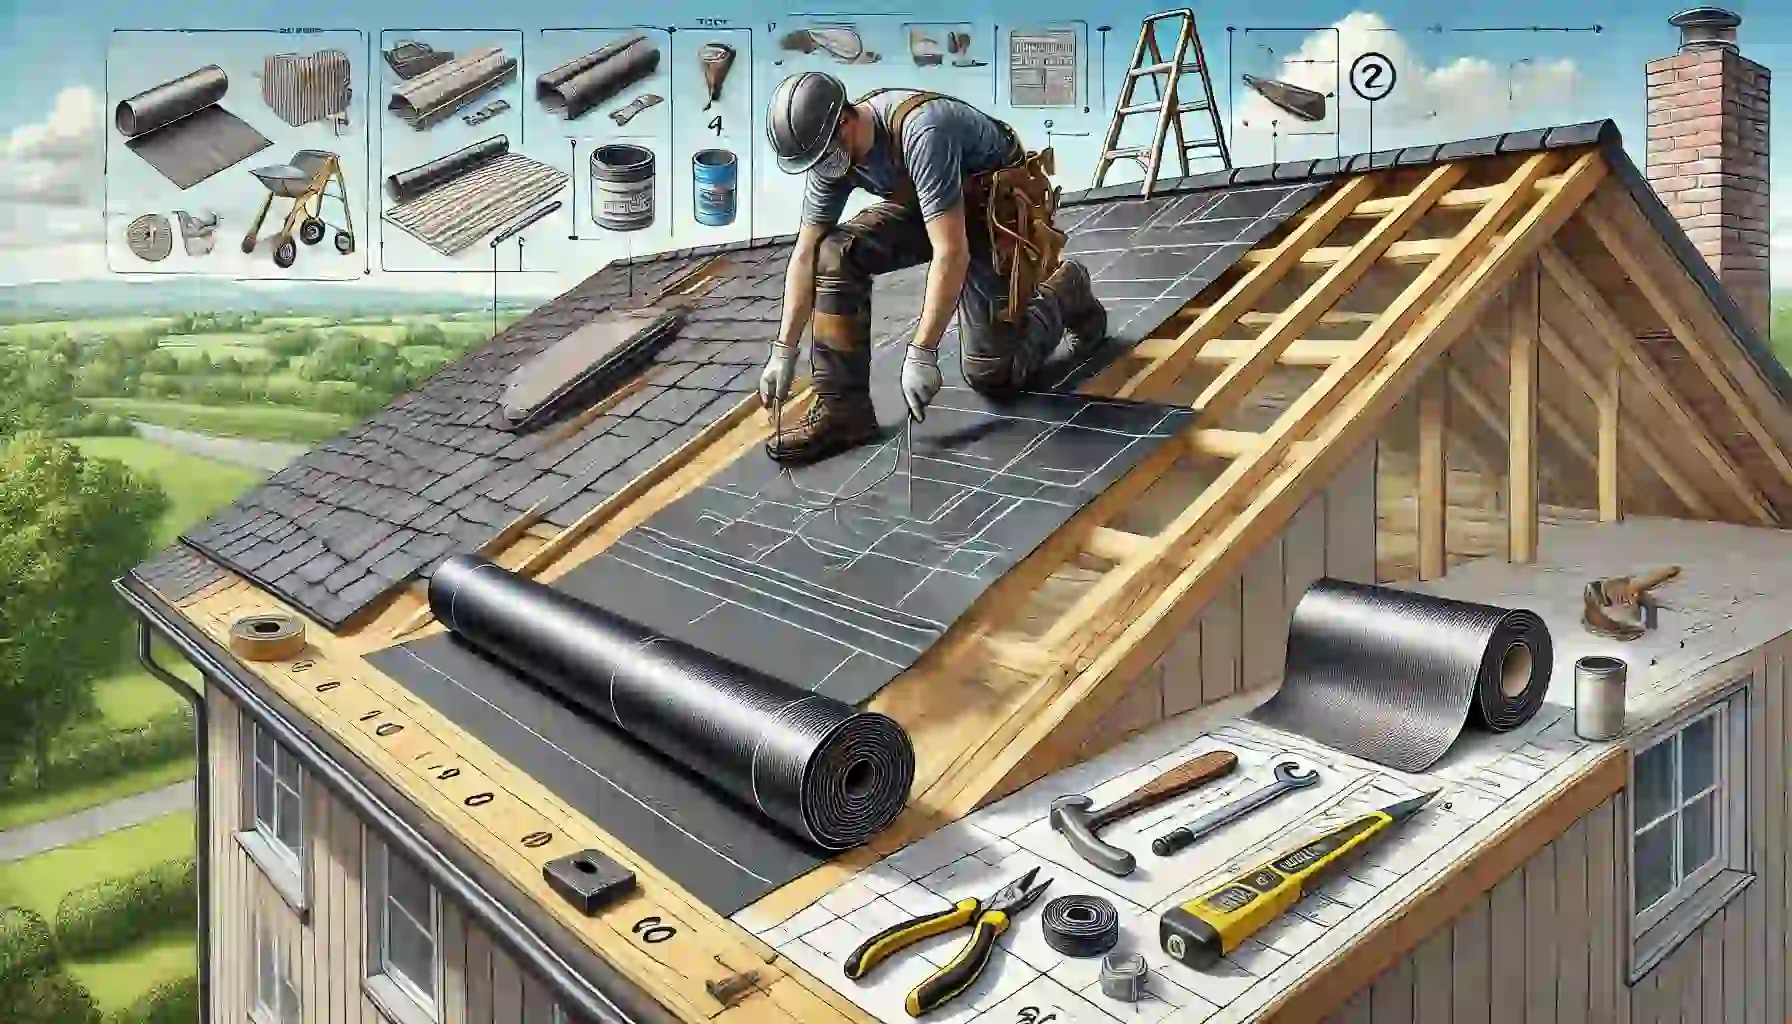
Installing roofing paper is a crucial step in the roofing process to ensure your home remains protected from the elements. Whether you’re working with asphalt shingles or other roofing materials, roofing paper, also known as roofing felt or underlayment, provides an additional layer of protection. To start, it’s essential to understand how to install roofing paper properly to achieve maximum durability. This guide will take you through the step-by-step process of installing roofing paper, from attaching the drip edge to nailing the roofing felt securely in place. Proper installation of roofing felt helps prevent leaks, ensures a stable foundation for shingles, and keeps moisture out of your home. Additionally, we will cover tips for aligning roofing felt, proper overlap techniques, and how to install tar paper on a roof, providing comprehensive coverage of all the essential steps. Understanding how to install roofing underlayment and how to apply roofing paper is key to ensuring your roof’s longevity and performance.
Step-by-Step Guide to Installing Roofing Paper
Installing roofing paper (or roofing felt) correctly is essential for building a strong and durable roof. It not only serves as a protective underlayment beneath the roofing shingles but also plays a crucial role in preventing water damage. Here’s a detailed step-by-step guide to installing roofing paper with clarity, ease, and practical advice.
Step 1: Preparing the Roof Surface
Before you start installing roofing paper, it’s critical to prepare the roof’s surface properly. A clean and dry surface ensures that the roofing paper adheres well and works efficiently.
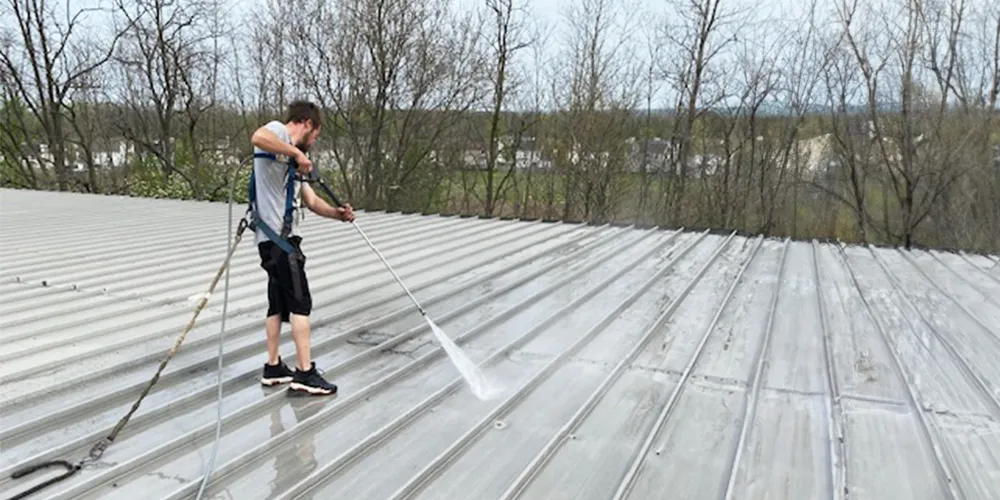
Key Actions to Prepare the Roof:
- Inspect the Roof: Thoroughly examine the roof for any existing damage, such as missing shingles, cracks, or leaks. Repair any issues to create a stable base for your roofing paper installation.
- Clean the Roof: Remove all dirt, debris, and leaves. A clean surface ensures proper adhesion of the roofing felt. Any debris left behind can create bumps that may interfere with the paper’s coverage.
- Check for Moisture: The roof surface should be dry. Roofing paper can absorb moisture, which could damage the paper’s integrity and make it ineffective as an underlayment.
Proper surface preparation is key to ensuring the long-lasting performance of your roofing paper.
Step 2: Attaching the Drip Edge
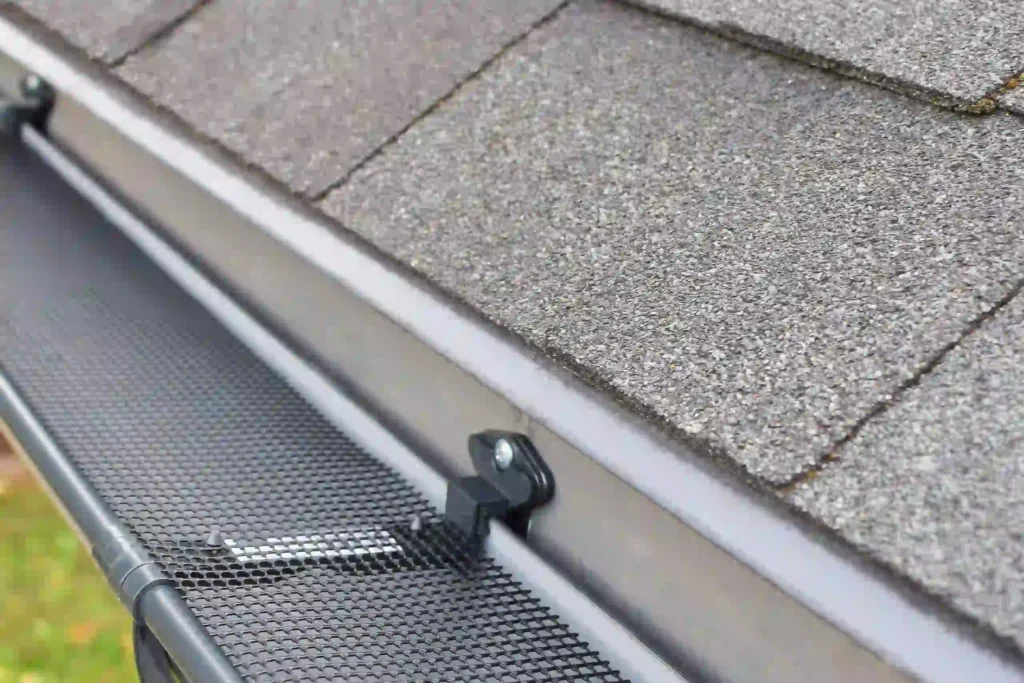
The drip edge is installed along the edges of the roof to direct water away from the structure. Installing it properly is crucial for protecting the roof’s perimeter.
Steps for Installing the Drip Edge:
- Install at Eaves First: Start at the eaves (bottom of the roof) and position the drip edge so that it extends slightly over the roof’s edge, allowing water to drain off.
- Secure the Drip Edge: Use roofing nails placed every 6 to 8 inches along the drip edge to keep it in place. Ensure that it is tightly attached to prevent shifting when the roofing paper is applied.
The drip edge provides essential protection, especially in areas prone to heavy rainfall, by keeping water from seeping under the roofing paper.
Step 3: Aligning the Roofing Paper
Proper alignment of the roofing paper ensures that it covers the entire roof and protects it from moisture. Incorrect alignment can lead to water infiltration and decrease the effectiveness of the roofing paper.
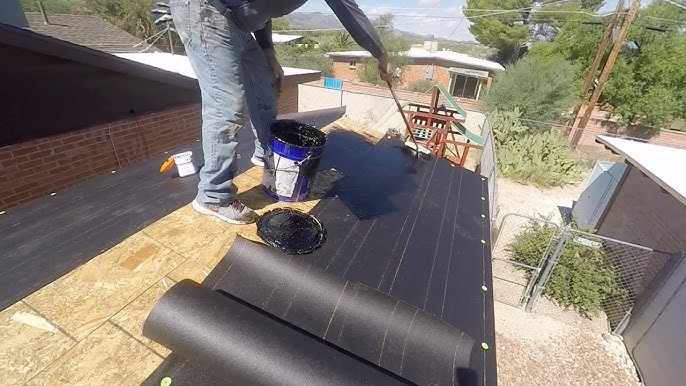
How to Align Roofing Paper:
- Start at the Bottom: Begin with the first row of roofing paper at the lowest point of the roof. This ensures that water flows over the paper instead of underneath it.
- Ensure Proper Overlap: Each row of roofing paper should overlap the previous row by at least 2 to 3 inches. This overlap ensures a watertight seal, preventing leaks.
- Check for Wrinkles: As you unroll the roofing paper, ensure it lies flat without wrinkles or air bubbles. This will prevent any trapped moisture and ensure an even application.
Proper alignment not only ensures the roofing felt performs as expected but also enhances the overall durability of your roofing system.
Step 4: Nailing the Roofing Felt
Once you’ve aligned the roofing paper, securing it with nails is essential for holding it in place. Proper nailing prevents the roofing paper from shifting or blowing away in high winds.
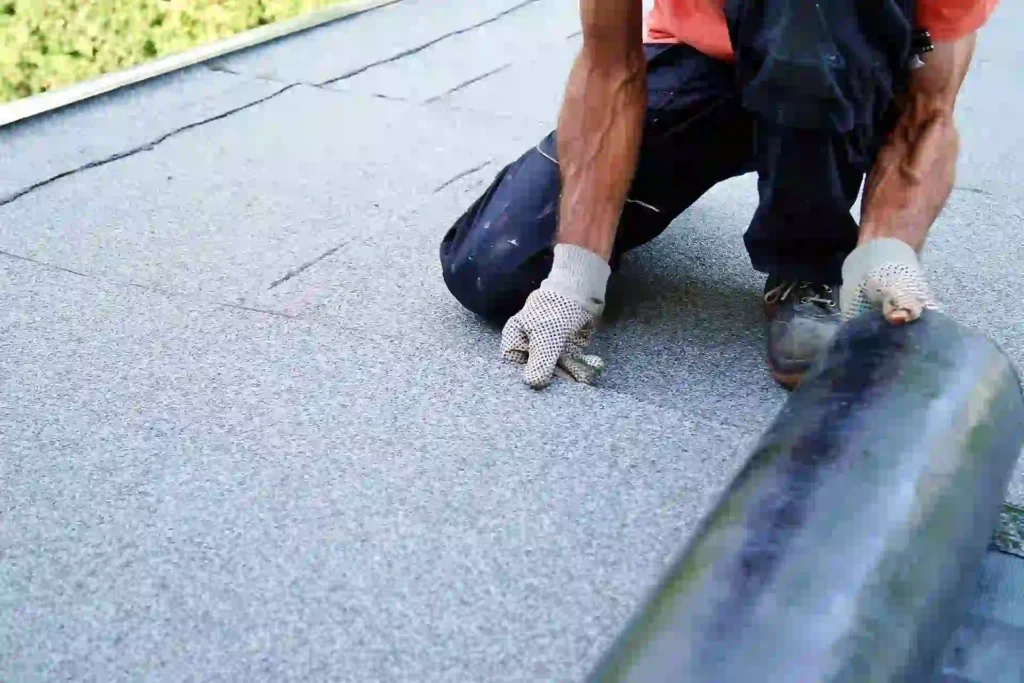
Nailing Roofing Felt:
- Nail the Top Edge: Secure the top edge of the roofing felt by placing nails every 6 to 8 inches. Be careful not to drive the nails too deep, as this can damage the paper.
- Secure the Sides: After the top is nailed down, place nails along the sides of the paper, ensuring the roofing paper stays firmly in place.
- Follow a Consistent Nailing Pattern: Maintain a consistent nailing pattern to ensure that the roofing paper is secured evenly across the roof surface. A well-secured roof ensures that your roofing paper functions effectively for years.
The proper installation of roofing paper with roofing felt nails will prevent shifting or lifting, ensuring the roofing felt stays securely in place.
Step 5: Overlapping the Roofing Paper
To prevent water from infiltrating beneath the roofing paper, it’s essential to overlap the seams properly. This overlap ensures a water-resistant barrier that extends across the entire roof surface.
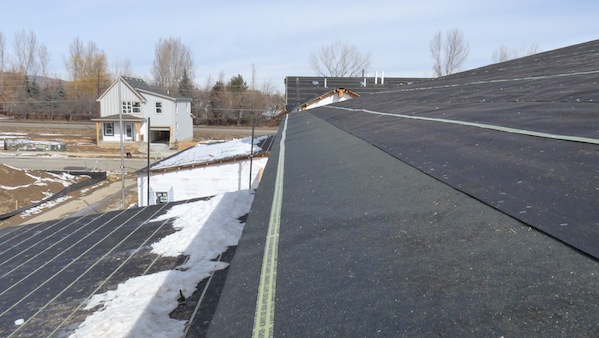
How to Overlap Roofing Paper:
- Overlap Each Row by 2 to 3 Inches: Each row of roofing paper should overlap the previous one by at least 2 to 3 inches. This overlap is crucial for creating a watertight seal and protecting your roof from leaks.
- Check for Proper Alignment: After placing each row of paper, double-check the alignment to ensure it maintains an even and continuous coverage across the roof.
- Final Overlap at the Ridge: Once you reach the ridge of the roof, overlap the final layer of roofing paper towards the peak. Ensure the top layer extends over the ridge to prevent water infiltration.
Proper overlapping is critical for creating a roof that’s resistant to rain, snow, and other elements, ensuring the longevity of your roof underlayment.
Tools and Materials Needed for Roofing Paper Installation
To install roofing paper effectively, having the right tools and materials is crucial. Proper preparation and the use of the correct tools ensure a smooth installation process and a durable roofing system. In this section, we will cover the essential tools and materials needed to complete the job.
Essential Tools
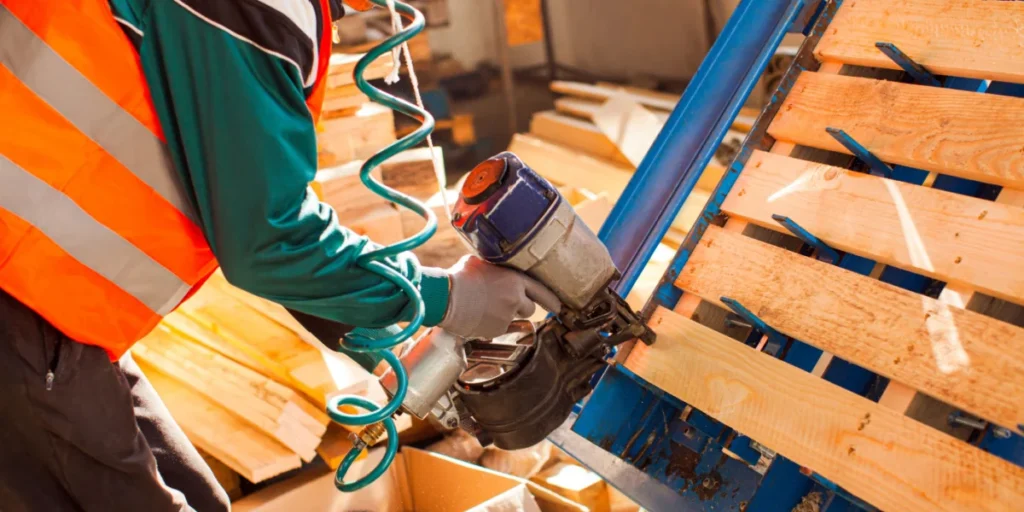
When it comes to installing roofing paper, using the right tools is essential to achieving a quality installation. Here is a list of essential tools that will make the roofing paper installation process easier and more efficient:
- Utility Knife: A utility knife is needed for cutting the roofing paper and making precise cuts around obstacles such as vents or chimneys.
- Staple Gun or Roofing Nails: Depending on the preference or roof type, you can use a staple gun or roofing nails to secure the roofing felt. Using the right roofing felt nails will ensure the paper stays in place through weather changes.
- Hammer or Pneumatic Nailer: A hammer can be used to secure roofing felt nails, but a pneumatic nailer is more efficient, especially for larger projects.
- Measuring Tape: For precise measurements to ensure the roofing paper is laid properly and evenly across the roof.
- Roofing Hatchet: A specialized roofing hatchet is useful for installing roofing felt and nails quickly and efficiently.
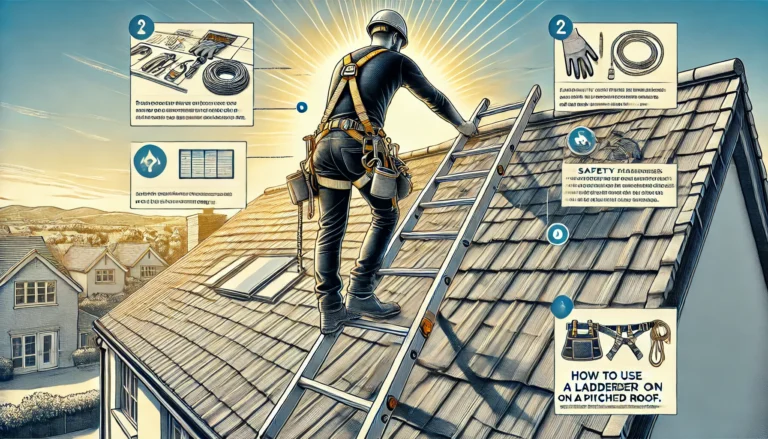
- Ladder: A sturdy ladder is essential to reach the roof safely. Make sure it is positioned at the correct angle and on stable ground to avoid accidents while working at height.
- Trowel: If you’re installing roofing paper in a valley or need to smooth over tar paper, a trowel can be helpful for even application.
Recommended Materials
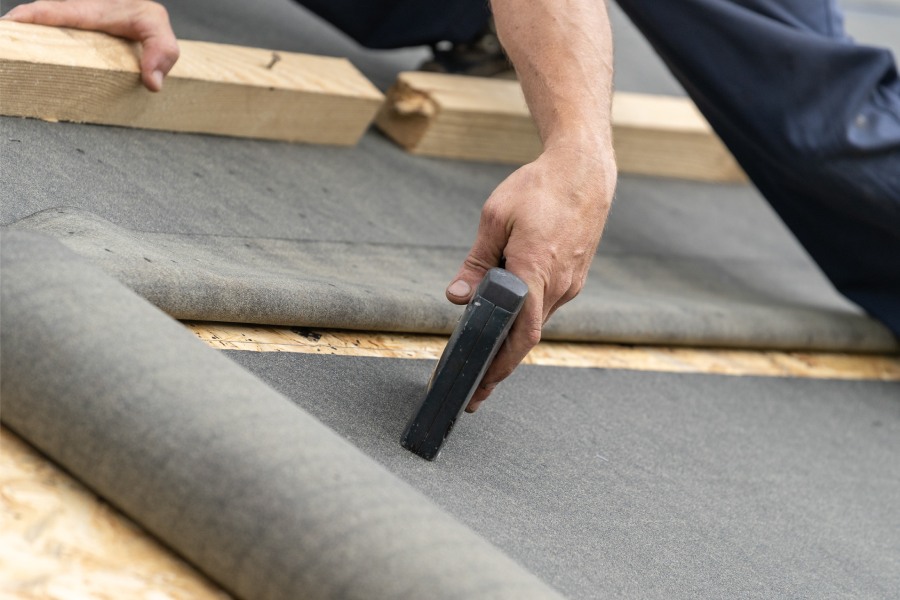
Choosing the right materials for your roofing paper installation is vital to ensuring a long-lasting and effective roof. Here are the recommended materials to consider:
- Roofing Felt: Roofing felt is the main material used in roofing paper installation. It acts as a protective underlayment for your roof. There are two main types of roofing felt: asphalt felt and synthetic felt. Both are effective, but synthetic felt is lighter, more durable, and water-resistant.
- Roofing Paper (Tar Paper): Roofing tar paper provides an additional layer of protection. It is commonly used for roofing underlayment installation, especially for its waterproofing properties.
- Drip Edge: A metal drip edge is important to protect the edges of the roof from water damage. It helps direct water into gutters and away from the roofing structure.
- Roofing Adhesive: Depending on the climate and roofing materials, roofing adhesive might be necessary for securing roofing felt or tar paper, especially in areas that experience heavy wind or rain.
- Roofing Nails: Use roofing felt nails with a wide head to prevent the paper from lifting during strong winds. The nails should be corrosion-resistant to ensure longevity and performance.
- Seam Tape: For added protection in valleys and seams, seam tape can be used to seal the gaps and prevent water from seeping through.
Advanced Tips for Professional Results
While the basics of roofing paper installation are essential for a solid roof, advanced techniques can elevate the quality of your installation and extend the lifespan of your roof. In this section, we will cover some professional tips, including the correct roofing felt nailing pattern and overlapping techniques for weather protection, to ensure a more effective and durable roofing paper installation.
Roofing Felt Nailing Pattern
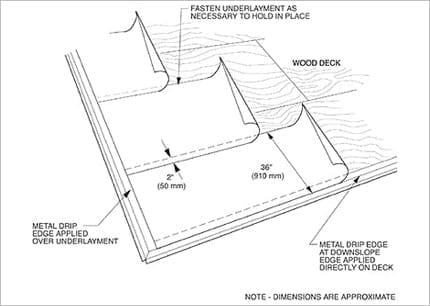
When installing roofing paper, getting the roofing felt nailing pattern correct is crucial for securing the material to your roof. A good pattern ensures that the roofing paper remains in place under various weather conditions, such as heavy winds or rain.
Here are some tips to follow:
- Nail placement: Use galvanized roofing nails to avoid rusting. Nail the felt in horizontal rows, spaced about 4 to 6 inches apart, and ensure nails are placed 1 to 2 inches from the edge.
- Use a consistent pattern: Ensure the nails are installed in a straight line. This maintains the structure’s integrity and makes the job look more professional.
- Overlapping: Overlap the roofing paper at least 2 inches at the seams for extra security.
Properly following the roofing felt nailing pattern not only ensures a tight installation but also contributes to the longevity and stability of your roof. If you are unsure of the exact measurements, consult the how to install roofing paper section of this guide for more precise details on nailing techniques.
Overlapping Techniques for Weather Protection
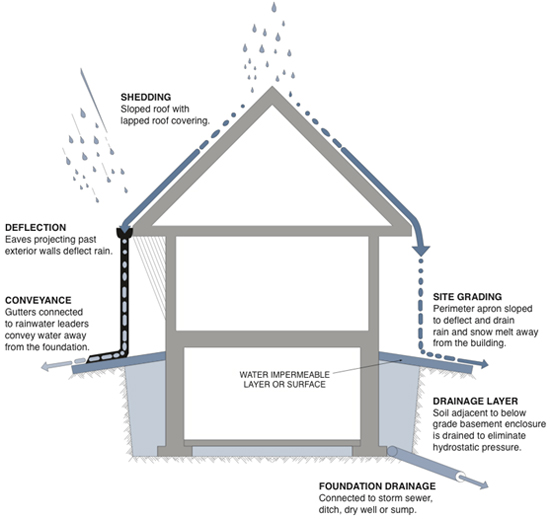
Overlapping roofing felt is an essential technique that helps protect your roof from water damage. When installing roofing paper, the right overlap ensures that rainwater flows off the roof without seeping under the roofing material.
Follow these tips for effective overlapping:
- Start from the bottom: Lay your first layer of roofing paper at the bottom of the roof, allowing it to extend over the edge slightly. This ensures water runs off the roof without finding its way under the paper.
- Overlap each new row: Ensure that each new layer of felt overlaps the previous one by at least 2 to 4 inches. This helps maintain a waterproof barrier that prevents leaks and water damage.
- Seam Sealing: In addition to overlapping, you should use roofing cement or a similar product at the seams to reinforce the overlap and increase the protection against wind-driven rain.
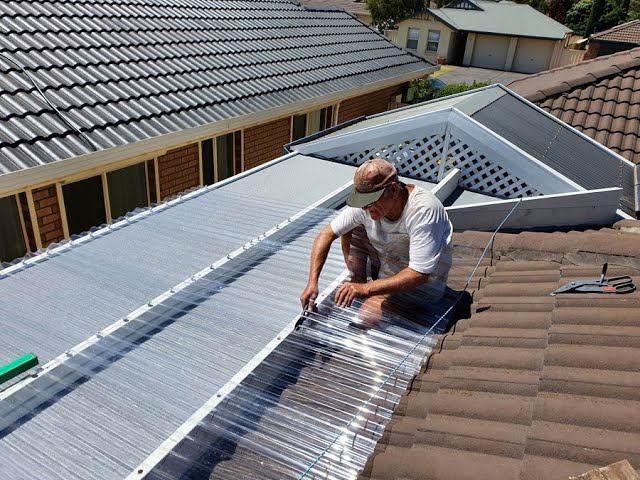
These overlapping techniques not only provide weather protection but also improve the lifespan of the roofing materials. If you’re considering more durable roofing options, you may want to check out our post on how to install polycarbonate roofing, as it also requires careful installation for optimal weather resistance.
What is Roofing Paper and Why is it Important?
Roofing paper, also known as roofing felt or tar paper, is an essential component used in the roofing system to provide a protective layer beneath the shingles or roofing material. It acts as an underlayment that helps prevent water infiltration, ensuring the durability and longevity of your roof. Roofing paper is typically made from a base material such as fiberglass or organic fibers that are saturated with asphalt for water resistance.
Installing roofing paper is crucial as it serves multiple roles, such as protecting the decking from the elements and providing a moisture barrier. Whether you are working with asphalt shingles or other roofing materials, the importance of roofing paper cannot be overstated. It acts as an added layer of protection against rain, snow, and even high winds, preventing leaks and maintaining the integrity of your roof structure.
Benefits of Using Roofing Paper
Using roofing paper during installation provides a wide range of benefits that help extend the life of your roof. Here are the key advantages:
- Water Resistance: One of the main benefits of roofing paper is its ability to resist water. When installed properly, it prevents water from reaching the roof decking, reducing the risk of leaks and water damage, especially during heavy rainfall. This is especially crucial when installing roofing felt underlayment, which adds an extra layer of defense against moisture.
- Protection from Wind: Roofing paper acts as a secondary barrier against strong winds. It prevents the wind from getting under the shingles, which can cause them to lift or become damaged, thus maintaining the roof’s structural integrity.
- Improved Energy Efficiency: Some types of roofing paper also help with insulation, keeping the roof cooler during hot summer months and warmer during winter, thus contributing to better energy efficiency.
- Cost-Effective Protection: Roofing paper is relatively affordable and provides excellent protection for a minimal cost compared to other roofing materials. It’s a cost-effective solution to increase the lifespan of your roofing system.
- Adds to Roofing Durability: Whether you’re installing polycarbonate roofing or traditional asphalt shingles, roofing paper adds an additional layer of durability, preventing damage from moisture, UV rays, and other weather conditions.
- Prevents UV Damage: By acting as an additional barrier, roofing paper helps protect the shingles or roofing material from the harsh UV rays of the sun, reducing the chance of fading, cracking, or warping over time.
When considering how to install roofing paper, understanding its role and benefits is crucial for ensuring a successful installation and long-term roof performance.
Preparation Before Installation
Proper preparation before installing roofing paper is essential to ensure a successful roofing project. If your roof is not adequately prepared, the installation can lead to issues such as leaks, poor adhesion, and premature damage to your roofing system. Here are the critical preparation steps to follow:
Inspecting the Roof
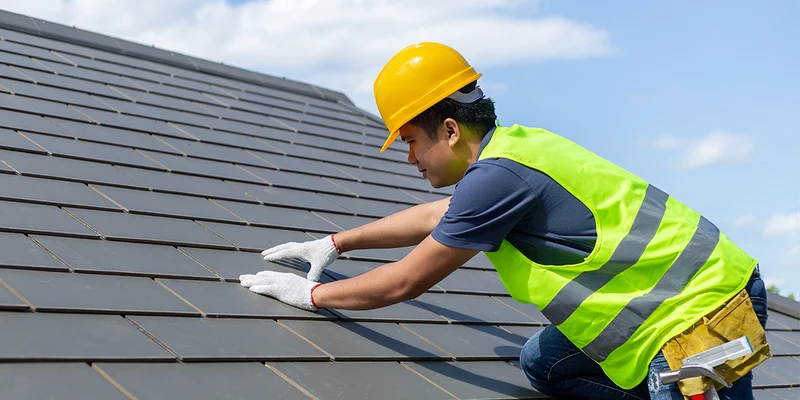
Before you begin laying roofing paper, it’s vital to inspect the roof thoroughly. This step ensures that the structure is sound, and you can identify any potential issues that need addressing before the installation. Here’s how to properly inspect your roof:
- Check for Roof Damage: Look for any damaged or missing shingles, cracked flashing, or signs of leaks. This is especially important if you’re working with an existing roof structure, as any underlying issues can affect the roofing paper’s performance.
- Assess the Decking: The roof decking (plywood or OSB boards) must be in good condition. Look for areas that may be sagging, warped, or showing signs of rot. If you find damaged decking, it should be repaired or replaced before proceeding.
- Inspect for Debris: Clear the roof of any debris such as leaves, branches, or old roofing materials. These can obstruct proper installation and affect the adhesion of roofing paper.
- Check the Pitch and Structure: Ensure that the pitch of the roof is stable and that the roof structure can support the additional weight of roofing paper and shingles.
Proper roof inspection before installation will help prevent issues later and ensure your roof performs optimally. If you’re also wondering how to install polycarbonate roofing, a thorough roof inspection is equally important, as this type of material needs specific conditions for proper installation.
Cleaning and Repairing the Surface
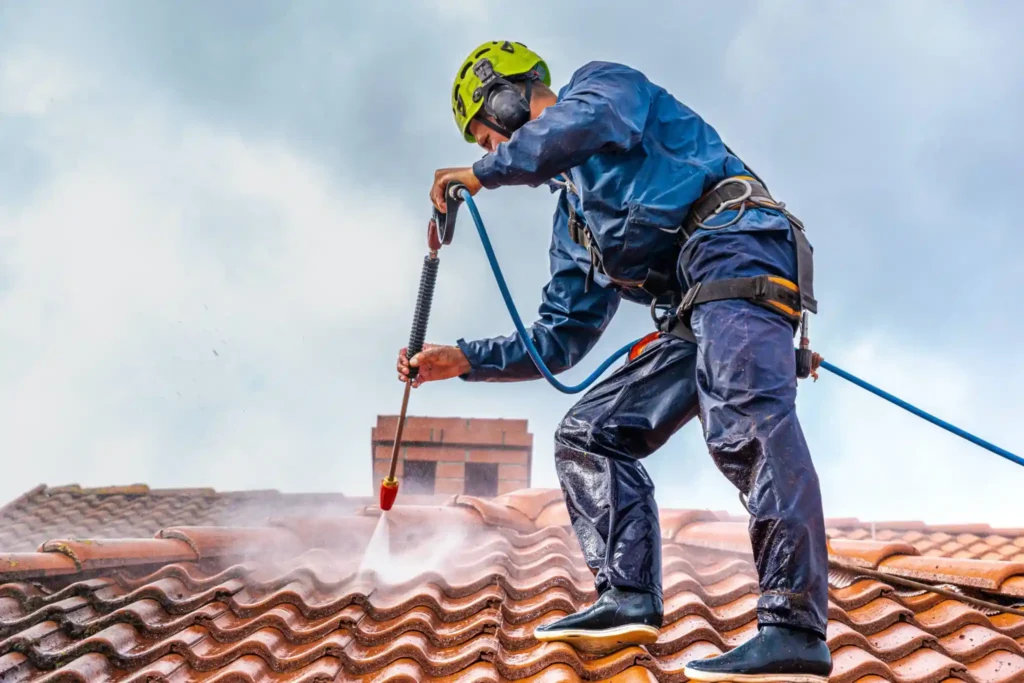
Once the roof has been inspected, the next step is cleaning and repairing the surface. A clean and smooth surface is essential for the roofing paper to adhere correctly and function as intended.
- Remove Old Roofing Materials: If you’re re-roofing, make sure to strip away any old shingles, roofing felt, or other underlayment. Any leftover roofing materials can compromise the installation of the new roofing paper, affecting its ability to resist water and other elements.
- Clean the Roof Decking: Sweep the roof decking to remove any dirt, dust, and debris. The surface must be dry and free from moisture to ensure proper adhesion of the roofing paper. If necessary, you can use a power washer to clean the surface, but ensure the decking is thoroughly dry before proceeding.
- Repair Any Roof Decking Issues: If you find any signs of damage during the inspection, such as cracked boards, rot, or water damage, repair these areas immediately. Use plywood or OSB boards to replace any damaged decking. Ensure that the surface is level to prevent uneven roofing paper installation.
- Check for Leaks and Moisture: Before installing roofing paper, make sure there are no active leaks in the roof. If there are any, they should be addressed before laying the roofing paper. Moisture left on the surface can hinder the performance of the underlayment and may cause premature failure of the roofing system.
- Ensure a Smooth Surface: For the roofing paper to adhere properly, the surface must be as smooth as possible. If there are any protrusions, like nails or screws, make sure they are flush with the roof decking to prevent damaging the roofing paper during installation.
Proper cleaning and repairing will ensure that the roofing paper lays smoothly and adheres well, helping prevent common roofing issues such as leaks and water damage.
Common Mistakes to Avoid When Installing Roofing Paper
While installing roofing paper seems straightforward, there are several common mistakes that can hinder its performance, causing long-term issues for your roof. Avoiding these errors will help ensure a smooth, professional installation and extend the life of your roof.
1. Skipping Roof Preparation
One of the most common mistakes when installing roofing paper is skipping or rushing the preparation steps. Proper roof inspection and cleaning are crucial for ensuring that the roofing paper adheres correctly. If there is any debris, moisture, or damage on the roof decking, it can cause the roofing paper to fail prematurely, leading to water damage and leaks.
How to Avoid This Mistake:
- Inspect the roof for damage, debris, and moisture before installation.
- Repair any damaged decking or remove old roofing materials if necessary.
- Make sure the surface is dry and clean for optimal adhesion.
2. Not Overlapping the Roofing Paper Correctly
A significant error that can lead to leaks is improper overlap of roofing paper. Roofing paper should overlap the edges of the previous row to ensure water flows off the roof properly. Insufficient overlap can allow water to seep between layers, which can lead to leaks and damage over time.
How to Avoid This Mistake:
- Ensure that each layer of roofing paper overlaps the previous one by at least 2-4 inches, depending on the type of roofing material.
- Pay attention to the overlap along the roof valleys, as these areas are particularly vulnerable to water infiltration.
3. Using the Wrong Nailing Pattern
Using the wrong nailing pattern is another mistake that can compromise the integrity of your roofing paper installation. When nails are placed too far apart or in the wrong pattern, it can lead to poor adhesion and can cause the roofing paper to shift or lift, especially in strong winds.
How to Avoid This Mistake:
- Follow the manufacturer’s guidelines for proper nailing spacing and pattern.
- Typically, nails should be placed about 6 to 8 inches apart along the edges and 12 to 18 inches apart in the middle of the roofing paper sheets.
- Use roofing nails with large heads to ensure a secure attachment.
4. Installing Roofing Paper in Bad Weather
Installing roofing paper during adverse weather conditions, such as rain or strong winds, is another common mistake. Roofing paper needs to adhere to the roof properly, and wet or windy conditions can interfere with this. Additionally, attempting installation in wet weather can damage the roofing materials, especially if the roof decking gets wet.
How to Avoid This Mistake:
- Choose a dry, calm day for installation to ensure proper adhesion of the roofing paper.
- If you must install roofing paper in less-than-ideal conditions, ensure that the roof deck is completely dry, and avoid installing during heavy rain or gusty winds.
5. Not Using the Correct Type of Roofing Paper
Using the wrong type of roofing paper is a mistake that many homeowners make, especially when re-roofing or upgrading their roofs. There are different types of roofing paper, such as felt, synthetic, and self-adhering membranes, each suited for different climates and roof types. Using the wrong kind of material can lead to poor performance and increased maintenance needs.
How to Avoid This Mistake:
- Select roofing paper that is appropriate for your region’s climate and your specific roof type.
- If you’re unsure, consult with a roofing professional to ensure you’re using the right material for your roofing paper installation.
6. Underestimating the Importance of Drip Edges
A drip edge is a vital component that directs water away from the roof’s edge and prevents it from seeping under the roofing materials. Some homeowners skip this important step or don’t install it correctly, leading to water infiltration and damage to the roof decking and fascia.
How to Avoid This Mistake:
- Install a drip edge along the eaves and rakes of the roof to ensure proper water drainage.
- Make sure the drip edge is secured properly before you begin laying the roofing paper.
7. Not Considering Future Repairs or Maintenance
Ignoring the need for future maintenance can be detrimental to the long-term performance of your roof. While roofing paper may seem like a permanent solution, it’s essential to consider future repairs and how the roofing paper will affect them. Not leaving enough space or not ensuring ease of access for repairs can make it difficult to fix issues down the line.
How to Avoid This Mistake:
- Make sure that the roofing paper installation allows for future repairs without major disruption to the roofing system.
- Leave sufficient space around roof vents, chimneys, and skylights to facilitate future maintenance.
8. Rushing the Installation Process
Lastly, rushing through the roofing paper installation process can lead to sloppy work and mistakes. Properly following each step and taking the time to ensure everything is done correctly is key to a successful installation. Hurrying through the process may result in uneven layers, improper nailing, and other errors that will cost you time and money to fix later.
How to Avoid This Mistake:
- Take your time during the installation process, paying attention to each step.
- Don’t rush the nailing, overlapping, or preparation stages.
- Allow time for drying and curing before completing other stages of the roofing project.

