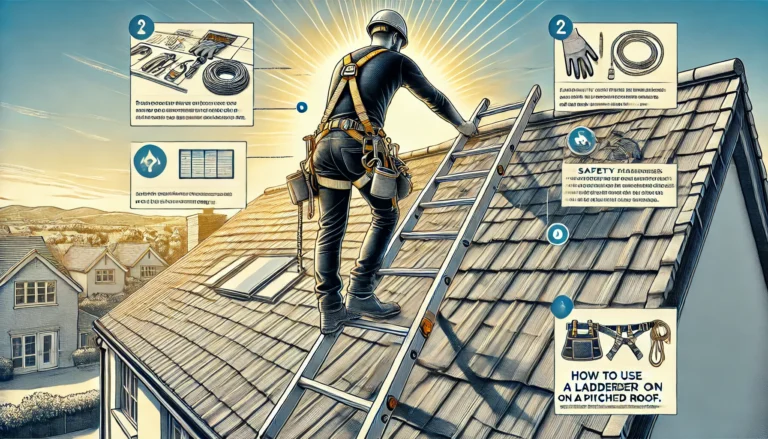
How many square feet in a roofing square?
A roofing square is a standard unit of measurement used in the roofing industry, equal to 100 square feet of roof surface. If you’re wondering how many square feet in a roofing square?, the answer is 100 square feet. This measurement simplifies estimating materials, costs, and labor for roofing projects, making it easier for contractors and homeowners to communicate effectively.
Whether you’re calculating shingles, underlayment, or other materials, knowing the number of roofing squares on your roof helps ensure accurate project planning. For example, a roof with 2,000 square feet of surface area equals 20 roofing squares.
What Is a Roofing Square?
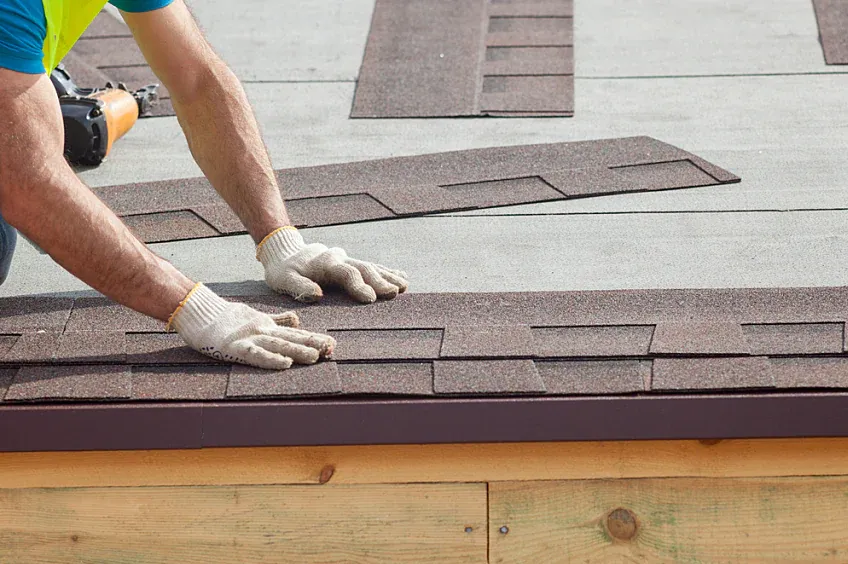
A roofing square is a standardized measurement in the roofing industry, representing 100 square feet of roof area. It simplifies calculations for materials, costs, and labor, making it an essential term for both contractors and homeowners planning roofing projects.
Using roofing squares streamlines the process of determining how much material is required, helping to avoid waste or shortages. Understanding this measurement is critical for accurate estimates and project planning.
Definition and Purpose of a Roofing Square
- A roofing square equals 100 square feet of roof surface, commonly used to calculate roofing materials.
- It simplifies communication between contractors and homeowners, creating a standard measurement for estimates.
- Understanding this unit helps prevent confusion when planning and budgeting roofing projects.
Why Roofing Squares Are Essential for Roofing Projects
- Roofing squares make it easier to estimate material needs, reducing waste and saving money.
- They provide a consistent measurement for comparing costs and project requirements across different roofing contractors.
- Accurate roofing square calculations ensure proper ordering of materials, avoiding project delays.
How to Measure a Roofing Square Accurately
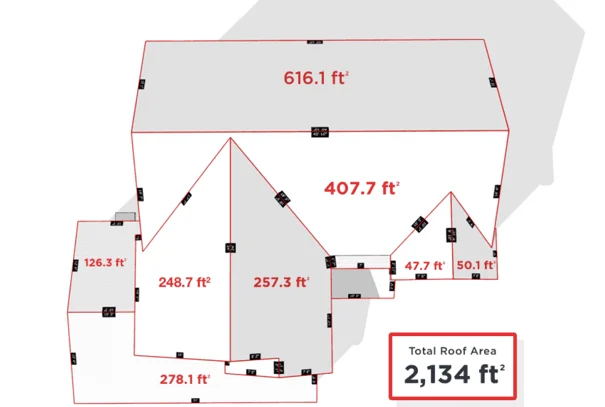
Measuring a roofing square accurately is essential for proper planning and budgeting for any roofing project. An accurate measurement ensures you order the correct amount of materials and helps avoid costly mistakes. Whether you’re a contractor or a homeowner, learning the right approach can save time and money.
The process involves determining your roof’s total square footage and dividing it by 100 to calculate the number of roofing squares. Using the right tools and following proven tips will make the process straightforward and reliable.
Tools You Need to Measure a Roofing Square
- Measuring Tape or Laser Measure: To measure the dimensions of the roof or home’s footprint.
- Roofing Calculator or Spreadsheet: To quickly calculate square footage and convert it into roofing squares.
- Safety Equipment: Including a harness, gloves, and non-slip shoes for safe roof access.
Tips for Ensuring Accurate Roofing Square Measurements
- Account for Roof Pitch: Use a pitch factor multiplier to adjust for sloped surfaces.
- Include Overhangs and Eaves: Measure all parts of the roof to avoid underestimating material needs.
- Double-Check Measurements: Re-measure critical areas to ensure accuracy and reduce the chance of errors.
Step-by-Step Guide to Calculating Roofing Squares
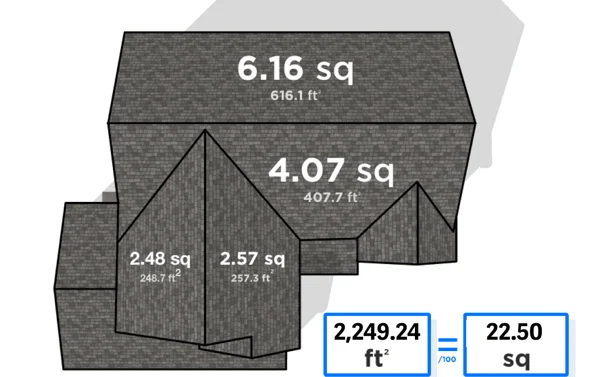
Calculating roofing squares is a crucial step in estimating the amount of materials and costs for a roofing project. By accurately measuring your roof’s dimensions and applying the correct formulas, you can determine how many roofing squares you’ll need. This process is essential for efficient planning and preventing material shortages or overages.
Follow this guide to simplify your calculations and adapt to various roof styles and complexities. Proper preparation ensures your project stays on track and within budget.
Breaking Down the Calculation Process
- Measure Roof Dimensions: Use a measuring tape to determine the length and width of each roof section.
- Calculate Total Square Footage: Multiply the length by the width of each section, then add them together for the entire roof area.
- Convert to Roofing Squares: Divide the total square footage by 100 to determine the number of roofing squares.
Common Scenarios When Calculating Roofing Squares
- Simple Flat Roofs: Straightforward measurements with no need for pitch adjustments.
- Sloped Roofs: Apply a pitch factor multiplier to account for the increased surface area.
- Complex Roof Designs: Measure individual sections separately and add adjustments for valleys, dormers, and overhangs.
How Many Shingles Are in a Roofing Square?
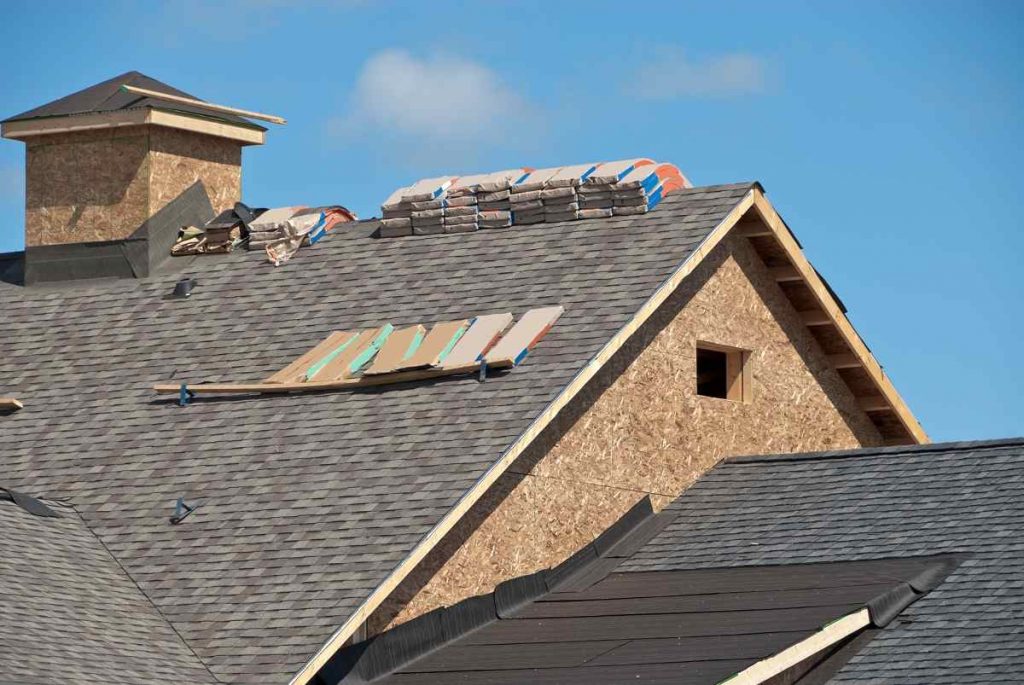
A roofing square typically requires three bundles of shingles, though this can vary depending on the type and size of the shingles. This measurement simplifies material estimation and ensures you have enough shingles to cover your roof efficiently.
Understanding how shingle types and roof features influence coverage is vital for accurate calculations. This helps avoid waste and ensures the project runs smoothly without interruptions.
Types of Shingles and Their Coverage per Square
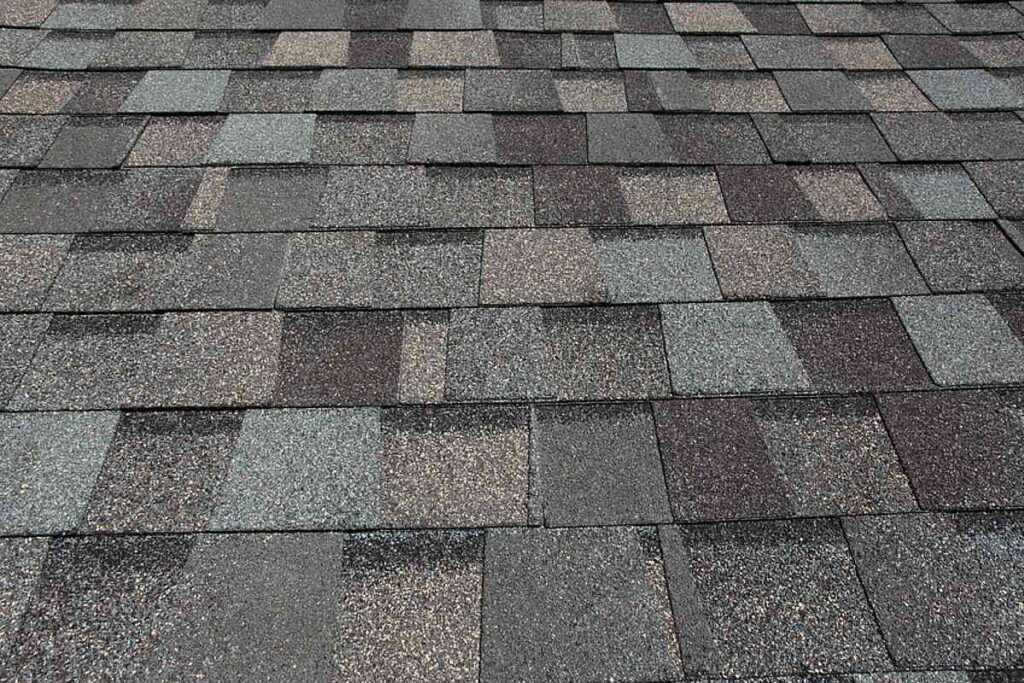
- Asphalt Shingles: Most common, with three bundles covering one roofing square.
- Architectural Shingles: Thicker and heavier, often requiring slightly more than three bundles per square.
- Specialty Shingles: Materials like slate or wood shakes may have different bundle requirements based on size and thickness.
Factors That Impact Shingle Quantity per Square
- Shingle Size: Larger shingles may cover more area, reducing the number of bundles needed.
- Roof Complexity: Extra shingles may be needed for cuts and overlaps on intricate roof designs.
- Waste Allowance: Always add 10-15% extra for waste, especially on roofs with many angles or valleys.
What Factors Affect the Cost per Roofing Square?
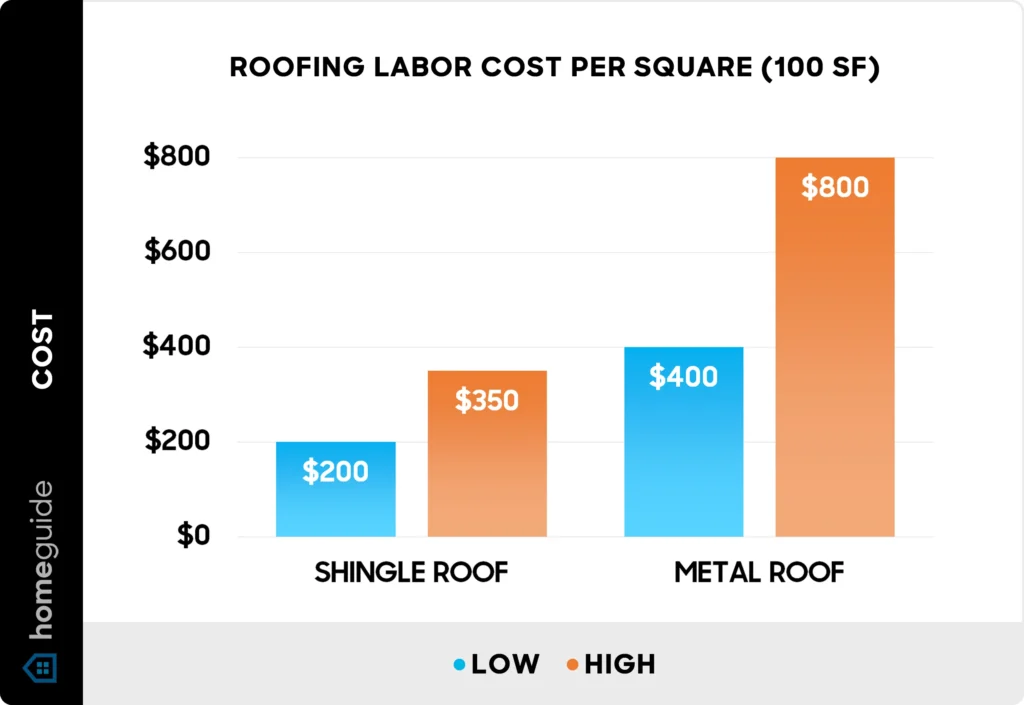
The cost per roofing square depends on several factors, including the materials used, labor costs, and the complexity of the installation. By understanding these variables, homeowners and contractors can better estimate total project expenses and plan accordingly.
Choosing the right materials and understanding how installation challenges affect labor costs are key to managing your budget effectively. Proper planning ensures a balance between quality and affordability.
Material Choices and Their Price Differences
- Asphalt Shingles: Affordable and widely used, typically costing $100–$200 per square.
- Metal Roofing: Durable but more expensive, with costs ranging from $300–$700 per square.
- Premium Materials: Slate or cedar shakes can exceed $1,000 per square due to their luxury appeal and longevity.
Labor Costs and Installation Complexity
- Roof Pitch: Steeper roofs require more time and effort, increasing labor costs.
- Roof Features: Complex designs with valleys, dormers, or chimneys require additional labor for precise installation.
- Local Labor Rates: Costs vary depending on regional market rates and contractor expertise.
Roof Pitch and Its Impact on Roofing Squares
The pitch of your roof is the slope or steepness, and it plays a significant role in the calculation of roofing squares. A higher pitch increases the surface area, which in turn affects the amount of materials needed and the complexity of the installation. Understanding your roof’s pitch is essential for accurate estimations of both materials and labor costs.
Roof pitch also influences the safety measures required during installation, and steep roofs may require specialized equipment or techniques to ensure proper installation.
How to Determine Your Roof’s Pitch
- Use a Roof Pitch Calculator: Measure the vertical rise over a 12-inch horizontal run to find the pitch.
- Simple Formula: Divide the rise (vertical measurement) by the run (horizontal measurement) to determine the ratio.
- Tools for Measurement: A level and framing square can also be used for a more hands-on calculation if needed.
Why Roof Pitch Affects Material and Labor Requirements
- Increased Surface Area: A higher pitch adds more area to the roof, requiring more materials to cover the surface.
- Labor Intensity: Steeper roofs make the job more difficult and dangerous, requiring additional labor hours and safety measures.
- Shingle Placement: Steeper roofs may require special techniques for shingle installation, such as additional overlaps or securing fasteners more securely.
Can You Use Your Home’s Square Footage to Estimate Roof Size?
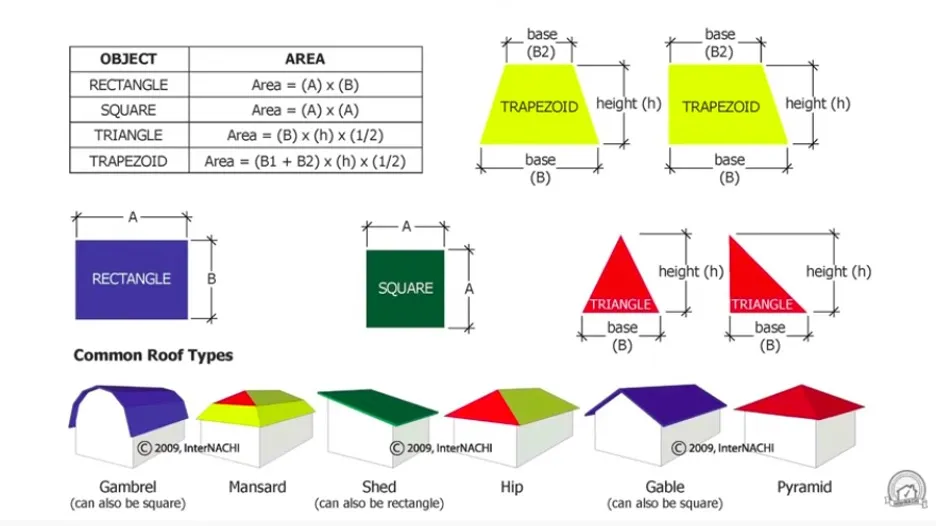
While your home’s square footage can offer a general idea of your roof’s size, it’s not a perfect measurement for determining roofing square footage. Roofs can have varying shapes, pitches, and overhangs, which makes the roof size different from the home’s footprint. However, using your home’s square footage as a rough guide can still be helpful during initial planning stages.
To get an accurate estimate for materials and costs, a more detailed calculation of your roof’s dimensions is required. This includes accounting for the roof’s slope, complexity, and any additional features.
Understanding the Correlation Between Roof and Home Size
- Basic Estimation: The roof’s size usually correlates with the home’s footprint, but other factors like roof style and design must be considered.
- Common Rule: Typically, a one-story home’s roof will be slightly larger than its square footage, especially if it has a steep pitch.
- Simple Comparison: A 1,500 square foot home might have a roof area between 1,600 and 2,000 square feet, depending on the roof type and pitch.
Limitations of Using Home Square Footage for Roof Estimates
- Roof Pitch Variations: A steep-pitched roof increases the total area, while a low-pitched roof may decrease it.
- Overhangs and Eaves: These features add extra square footage to the roof that isn’t accounted for in the home’s square footage.
- Roof Design Complexity: Roofs with multiple angles, dormers, or valleys require separate measurements and won’t directly correlate with the home’s floor area.
Roofing Materials per Square: What You Need to Know
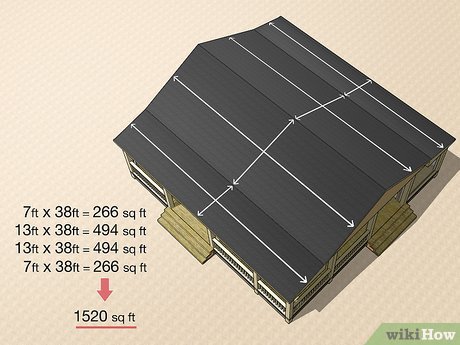
Understanding roofing materials per square is essential for accurate project planning and budgeting. A roofing square, which covers 100 square feet, requires a certain amount of material depending on the type of roofing you choose. Different materials have varying coverage rates and costs, and each type offers unique benefits in terms of durability, aesthetics, and performance.
By knowing how much material you’ll need per roofing square, you can better estimate your project’s total cost and ensure you have enough supplies for the job.
Overview of Common Roofing Materials
- Asphalt Shingles: The most common and cost-effective option, requiring three bundles per square.
- Metal Roofing: Offers durability and energy efficiency, with each panel typically covering one to two square feet.
- Wood Shakes: A natural and aesthetic option, usually requiring four bundles per square due to their irregular size.
- Slate and Tile: High-end materials requiring fewer bundles, but often more expensive and labor-intensive to install.
Choosing the Right Material for Your Roof’s Needs
- Climate Considerations: Metal roofing is ideal for areas with extreme weather, while asphalt shingles work well in moderate climates.
- Budget: Asphalt shingles are the most affordable, while metal, wood, and slate options tend to be more expensive.
- Aesthetic Preferences: Wood and slate offer a natural look, while metal and asphalt can be customized to suit different home styles.
How Roof Complexity Affects the Number of Squares
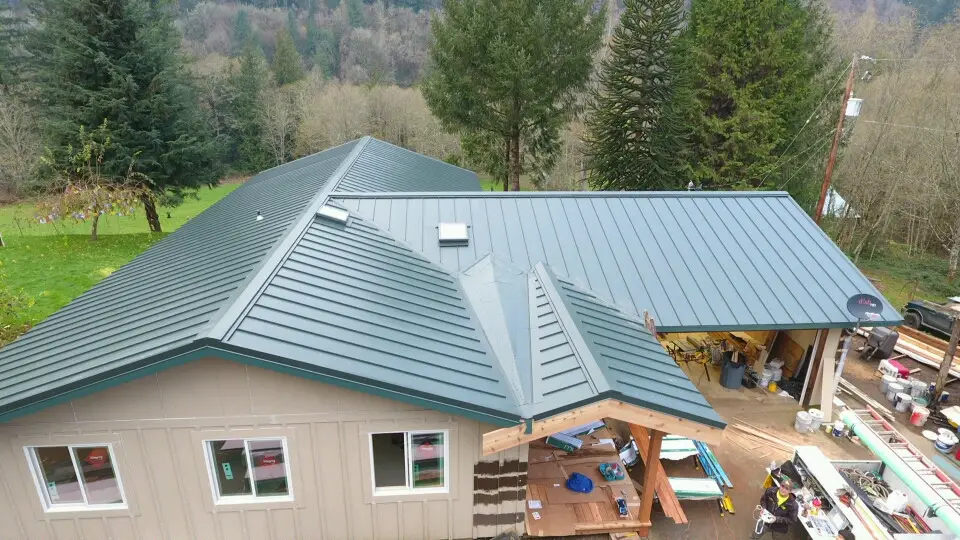
The complexity of a roof directly impacts the number of squares required for a roofing project. Complex roof designs with multiple angles, slopes, and features can significantly increase the surface area, requiring more materials and labor. Factors such as valleys, dormers, and overhangs add additional square footage that must be accounted for to avoid underestimating material needs.
Accurately calculating the number of roofing squares for complex roofs ensures that the correct amount of materials is ordered and that the project stays on budget.
Identifying Complex Roof Shapes and Features
- Multiple Slopes: Roofs with several slopes or levels can have a larger surface area, which increases material requirements.
- Gables and Hips: These features introduce extra surface areas that need precise measurements for accurate square footage.
- Irregular Shapes: Roofs with curves or unusual angles may require careful measurement to calculate the number of squares correctly.
Adjustments for Valleys, Dormers, and Overhangs
- Valleys: The area where two slopes meet requires extra shingles and materials, affecting the total number of squares.
- Dormers: These protrusions add additional surface area and must be measured separately to ensure correct material calculations.
- Overhangs: Roof overhangs extend beyond the walls of the home and must be included in the total square footage to avoid underestimating the required materials.
Roofing Square Cost Calculator: Estimate Your Expenses
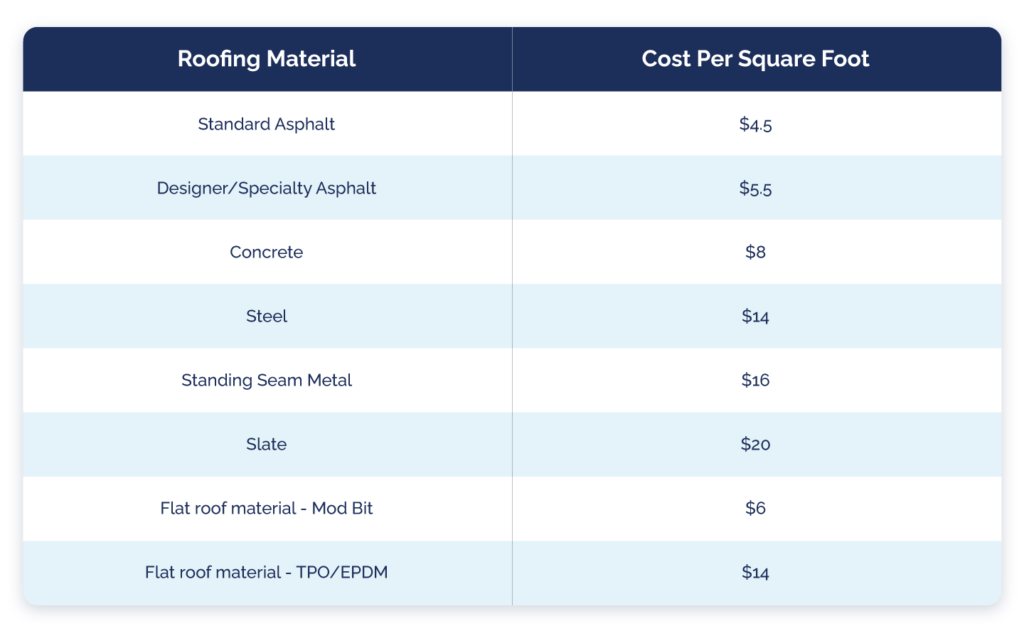
A roofing square cost calculator is an essential tool for estimating the overall cost of a roofing project. By inputting the number of roofing squares, material choices, and other variables, you can quickly get an estimate of how much your roof replacement or repair will cost. This tool helps you plan your budget and ensures there are no surprises in terms of expenses.
Using a roofing square cost calculator makes the complex task of pricing more straightforward by considering all relevant factors such as materials, labor, and additional features that affect the overall cost.
How to Use a Roofing Square Cost Calculator
- Input Roof Dimensions: Enter the total square footage or number of roofing squares, factoring in the roof’s complexity and pitch.
- Select Material Type: Choose the roofing material you plan to use (e.g., asphalt, metal, slate) as this affects the overall cost per square.
- Include Labor and Additional Costs: Input labor costs and any additional factors, such as permits or disposal fees, for a comprehensive estimate.
Common Inputs and Outputs in Cost Estimations
- Inputs: Roof size, material type, roof complexity, geographic location, and labor rates.
- Outputs: Total material costs, estimated labor costs, and overall project cost, including taxes and additional fees.
- Customization: Many calculators also allow for adjustments like waste factors and overhang measurements for more accurate estimates.
Tips for Measuring Roofing Squares on Different Roof Types
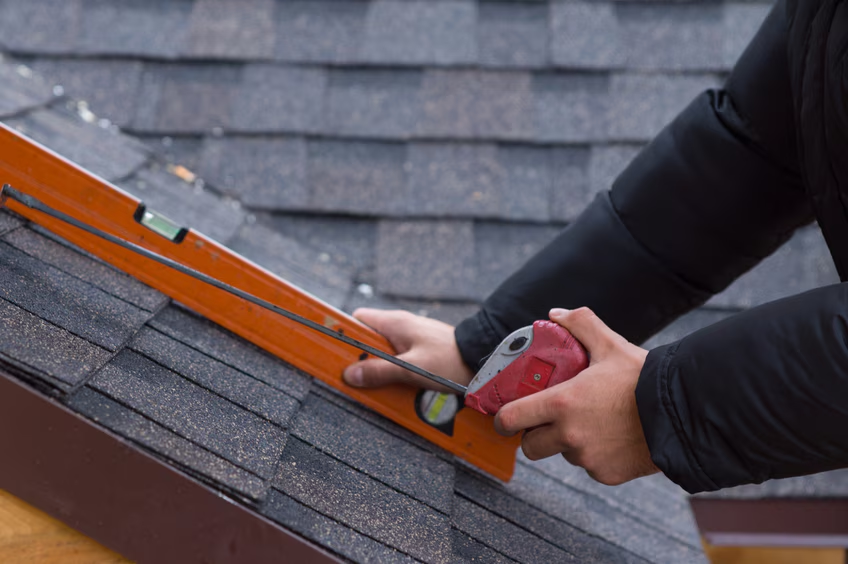
Measuring roofing squares accurately depends on the type of roof you are dealing with. Whether you’re working with a flat roof, sloped roof, or a multi-level design, each requires a slightly different approach for precise calculations. Understanding how to adjust for different roof types ensures you order the right amount of materials, just like with vinyl plank flooring, where precision in measurements is also key to avoid costly mistakes.
By following these tips for various roof types, you can streamline the process of calculating roofing squares and ensure your project runs smoothly, much like achieving a flawless vinyl plank flooring installation.
Measuring Flat vs. Sloped Roofs
- Flat Roofs: Measure the roof’s length and width, then multiply the two to find the total square footage. Flat roofs generally don’t require adjustments for pitch.
- Sloped Roofs: For sloped roofs, you must account for the pitch by multiplying the square footage by a pitch factor, as the slope increases the surface area.
- Adjust for Complexity: Flat roofs are simpler to measure, while sloped roofs may require factoring in valleys, dormers, or other design features.
Challenges in Measuring Multi-Level Roofs
- Different Elevations: Multi-level roofs require separate measurements for each level or section, especially if the roof angles change between levels.
- Complicated Designs: The more levels or slopes your roof has, the more sections you need to measure individually to avoid errors.
- Ensuring Accuracy: Use additional tools like a laser measure or roof pitch calculator to ensure you measure each section correctly and account for any overlaps or valleys.
Common Mistakes to Avoid When Measuring Roofing Squares
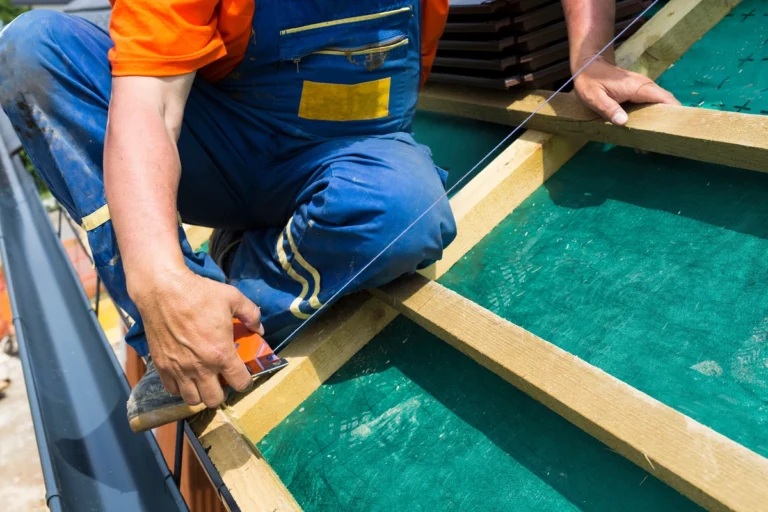
Accurate measurements are critical for roofing projects, and even small mistakes can lead to costly errors. Whether it’s ordering too many materials or running short, improper measurements can delay your project and increase costs. By avoiding common measuring mistakes, you can ensure the job is completed on time and within budget.
Careful attention to detail is essential for obtaining the right amount of roofing material and ensuring the proper execution of the roof installation.
Overestimating or Underestimating Roof Size
- Overestimating: Ordering too many materials can increase costs and lead to waste, which may not be returnable or usable for other projects.
- Underestimating: If the roof is larger than expected, you could run out of materials during the installation, leading to delays and additional costs for emergency orders.
- Use Accurate Tools: Ensure you’re using the proper tools and methods to get precise measurements and avoid guesswork.
Miscalculating Areas with Complex Features
- Complex Roof Design: Roofs with multiple valleys, dormers, or angles require special attention. Forgetting to measure these areas accurately can lead to material shortages.
- Adjust for Roof Pitch: Always apply the necessary pitch factor to sloped roofs, as neglecting this step can cause significant underestimations of the total area.
- Include Overhangs: Don’t forget to measure the overhangs, as these extra sections add to the roof’s total area and need to be factored into your material calculations.
How to Choose the Best Shingles for Your Roofing Square
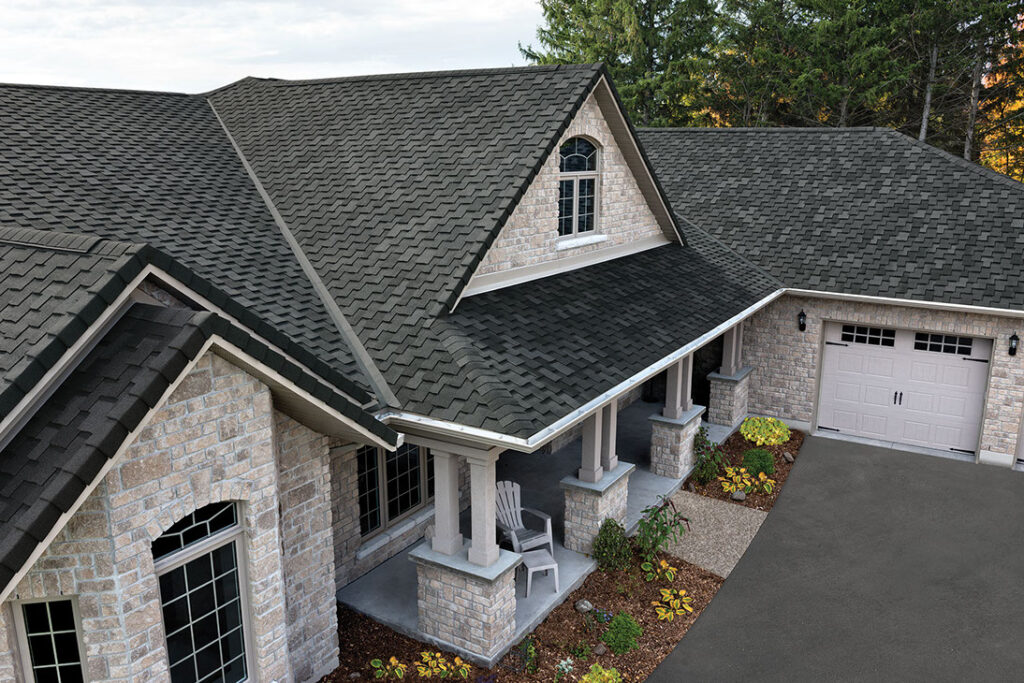
Choosing the right shingles for your roofing square is essential for durability, appearance, and performance. Different types of shingles offer various benefits, and the best choice for your roof will depend on factors like climate, budget, and the overall design of your home. Understanding the characteristics of each material helps you make an informed decision that meets both aesthetic and functional needs.
Selecting the best shingles ensures long-term performance, energy efficiency, and curb appeal, all while staying within budget.
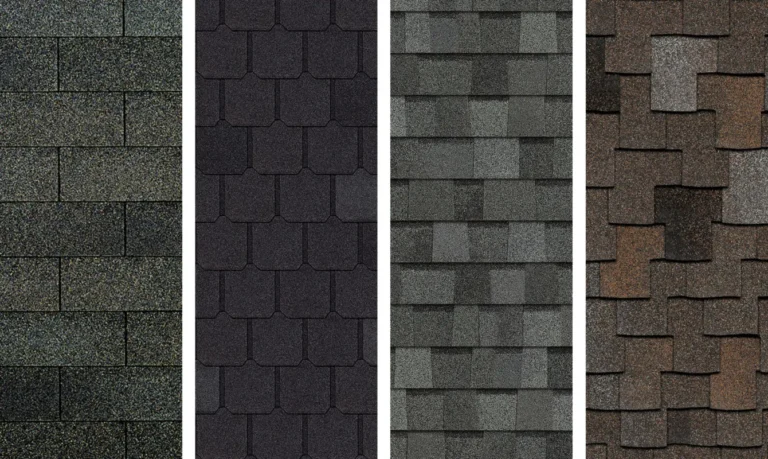
Comparing Asphalt, Metal, and Other Shingles
- Asphalt Shingles: Affordable and widely used, asphalt shingles are easy to install and come in various styles, but they may not last as long as premium options.
- Metal Roofing: Durable and energy-efficient, metal shingles are ideal for harsh weather conditions but come with a higher upfront cost.
- Other Materials: Options like wood, slate, or tile offer unique aesthetics but can be expensive and more challenging to install, requiring specialized skills.
Matching Shingles to Your Roof’s Design and Climate
- Roof Design: Asphalt shingles are ideal for most roof types, while metal shingles may be better for homes with a modern or industrial look. Slate or tile works well for historic or Mediterranean-style homes.
- Climate Considerations: Metal and tile shingles are excellent for extreme climates, offering fire resistance and weather durability, while asphalt shingles are suitable for temperate climates.
- Energy Efficiency: Reflective metal shingles are great for hot climates, as they reflect heat and keep the house cooler, while darker asphalt shingles may be more suitable for colder climates.
Understanding Roofing Square Measurements for New Roofs
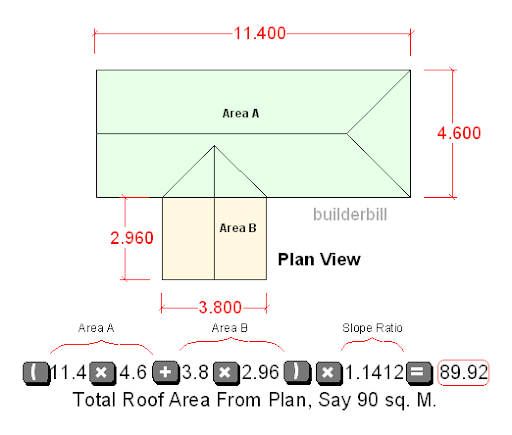
When installing a new roof, understanding roofing square measurements is crucial to ensure that materials are ordered accurately and that the project runs smoothly. A roofing square represents 100 square feet of roofing material, and proper measurement is key to determining how many squares you’ll need to cover your roof. Miscalculating roofing squares can result in costly mistakes and delays, so it’s important to get the measurements right from the beginning.
Accurate measurements for new roofs are essential not only for material estimation but also for cost prediction and time management.
Why New Roofs Require Precise Roofing Square Calculations
- Material Accuracy: Accurate calculations help prevent overordering or underordering materials, which can lead to project delays or increased costs.
- Proper Budgeting: Knowing the exact number of roofing squares helps to estimate labor and material costs more precisely, avoiding unexpected expenses.
- Ensuring Roof Integrity: Correct measurements ensure the roof will be properly covered, with no gaps or overlaps that could affect its performance.
Tips for Getting Accurate Measurements for New Roofs
- Measure Each Section Individually: For complex roofs with multiple slopes or sections, measure each one separately to ensure you capture the full surface area.
- Account for Roof Pitch: Always factor in the pitch of the roof as it impacts the total area that needs to be covered. A steeper pitch increases the surface area.
- Use Professional Tools: For better accuracy, use laser measures, pitch calculators, or even professional services to get the most precise measurements for new roofs.
Professional Roofing Square Calculation vs. DIY: Pros and Cons
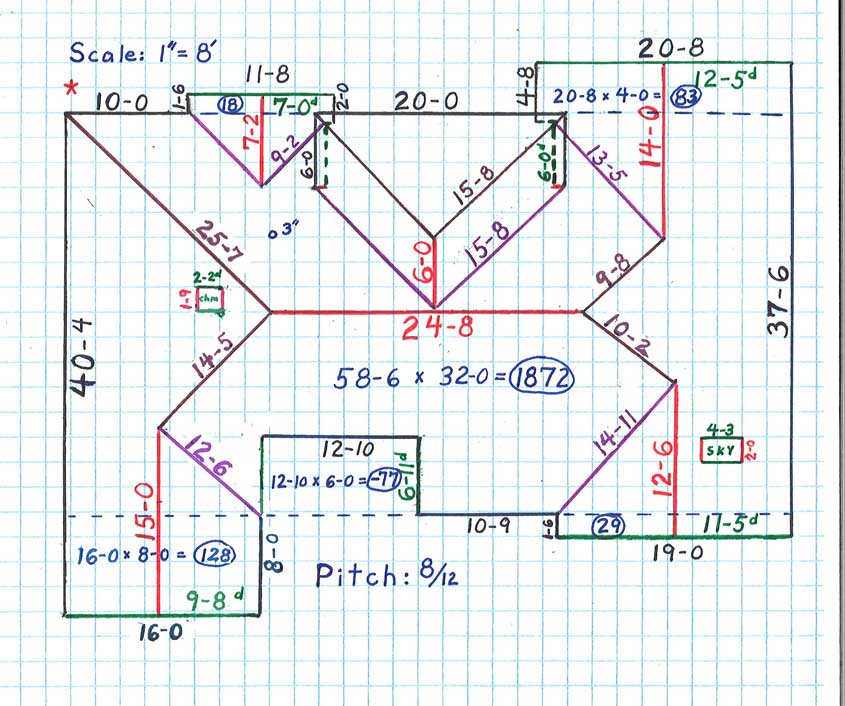
When it comes to roofing square calculations, homeowners can choose between hiring a professional or handling the task themselves. Each approach has its advantages and potential drawbacks. Professional roofers bring expertise and experience, ensuring accurate measurements and saving time, while DIY calculations may offer cost savings but come with the risk of mistakes. Understanding the pros and cons of each approach helps you make the best choice for your roofing project.
Choosing the right method for measuring roofing squares can influence the accuracy of material estimates, overall project cost, and the time it takes to complete the roof installation.
Benefits of Hiring a Professional for Roofing Square Measurement
- Expertise and Accuracy: Professionals are trained to measure complex roof designs and ensure every detail is accounted for, reducing the chance of errors.
- Efficiency: Hiring a professional speeds up the process, as they have the right tools and experience to measure your roof accurately in less time.
- Peace of Mind: A professional can also assess your roof’s condition and advise on the best materials, ensuring you avoid potential issues that could arise from incorrect measurements.
Key Considerations for a DIY Approach
- Cost Savings: By handling the measurements yourself, you can avoid paying for professional services, although you may still need to buy the necessary tools.
- Time and Effort: DIY roof measurements require more time and effort, especially for complex roofs, and any mistakes could lead to costly delays or rework.
- Risk of Inaccuracy: Without experience, there’s a higher chance of miscalculating, especially on steep, multi-level, or intricate roof designs, which can result in incorrect material orders.
Why Accurate Roofing Square Measurement Saves You Money
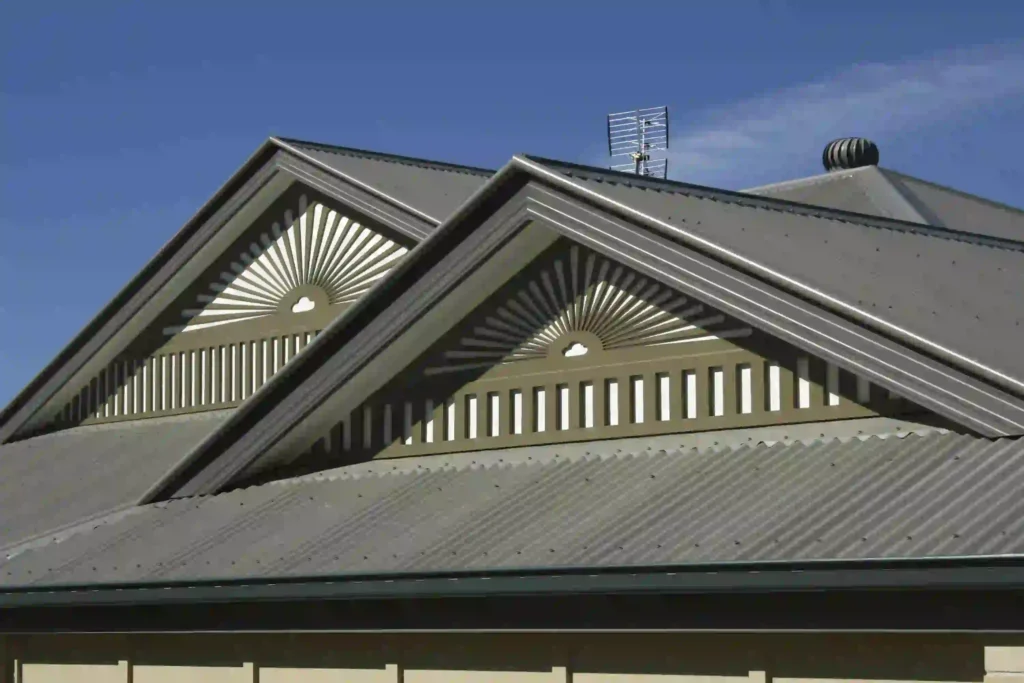
Accurate roofing square measurements play a significant role in controlling the costs of your roofing project. When you know the exact amount of material needed, you can avoid overspending on excess materials and labor. Proper measurements also help you plan effectively, ensuring the job is done efficiently with minimal errors or delays.
By focusing on accurate measurements, you can maximize your budget and ensure that your roofing project stays on track financially.
Reducing Waste with Accurate Measurements
- Preventing Overbuying: Accurate measurements ensure that you purchase the right amount of materials, reducing the risk of leftover supplies that may go unused or be wasted.
- Optimizing Material Usage: Proper planning allows for better material utilization, minimizing scrap and excess that would otherwise result in unnecessary costs.
- Environmentally Friendly: Reducing material waste not only saves money but also minimizes the environmental impact of your roofing project.
Avoiding Overcharges on Labor and Materials
- Accurate Material Estimates: Properly measuring the roof ensures you buy the correct amount of shingles, underlayment, and other materials, preventing overcharges due to inaccurate estimates.
- Efficient Labor Use: When the correct amount of materials is available, workers can complete the job faster without delays, reducing labor costs.
- Avoiding Emergency Purchases: Incorrect measurements might result in unexpected material shortages, forcing you to make last-minute purchases that could incur higher costs.
Everything You Need to Know About Roofing Squares
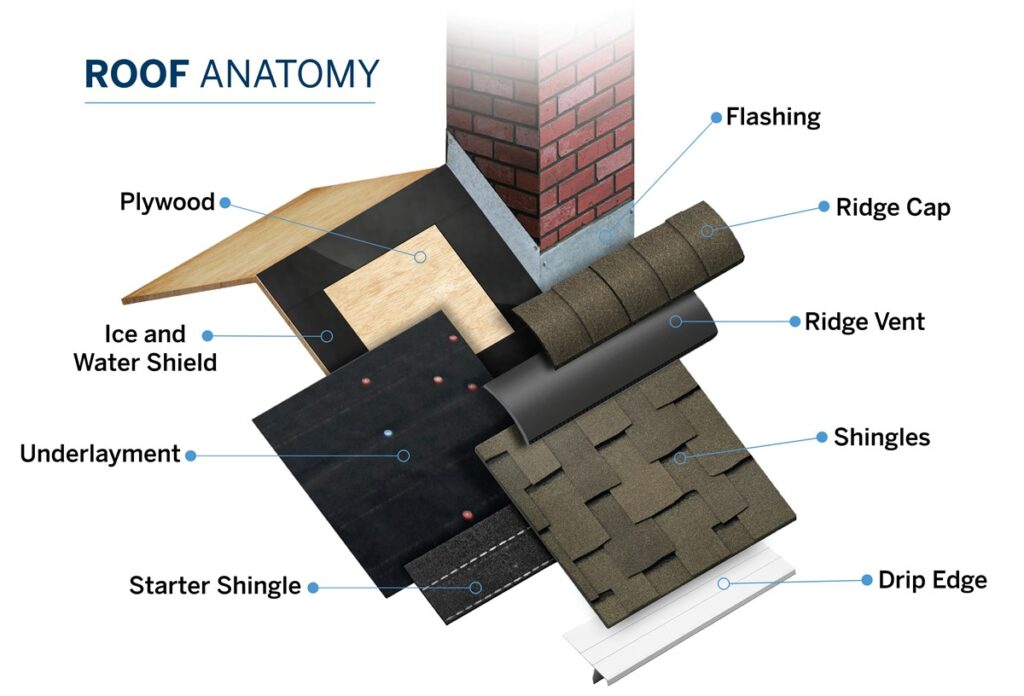
Roofing squares are the key unit of measurement used in the roofing industry to determine material requirements and project scope. Understanding roofing squares is essential for homeowners and contractors alike to ensure that roofs are measured and covered efficiently. Whether you’re installing a new roof or replacing an old one, knowing how to calculate and use roofing squares can help you save time, avoid mistakes, and stay within budget.
By familiarizing yourself with the basics of roofing squares, you can make informed decisions that lead to a smooth and cost-effective roofing project.
Common Questions About Roofing Squares Answered
- What is a roofing square?: A roofing square represents 100 square feet of roof area, a standard measurement used to estimate material needs for roofing projects.
- How many shingles are in a square?: Typically, there are around 3 bundles of shingles in a square, depending on the manufacturer and shingle type.
- Do roof pitch and complexity affect roofing squares?: Yes, roofs with steep pitches or complex designs will require more squares because they have greater surface areas.
Practical Tips for Homeowners and Contractors
- Measure Accurately: Always measure each roof section individually and factor in overhangs, valleys, and slopes to ensure precise material estimates.
- Consider Waste Factor: When ordering materials, account for a waste factor (typically 10%) to accommodate cutting and fitting.
- Consult a Professional: For complex roofs or if you’re unsure, consider hiring a roofing professional to ensure accurate measurements and avoid costly mistakes.
Conclusion:
Understanding and accurately measuring roofing squares is crucial for the success of any roofing project, whether you’re a homeowner or a contractor. Proper measurement helps ensure the right amount of materials are ordered, reducing waste, preventing overcharges, and saving both time and money. By carefully considering factors like roof pitch, design complexity, and material choices, and by following accurate measurement techniques, you can avoid costly mistakes and ensure your roof is installed efficiently and effectively. Whether you choose to handle the measurements yourself or hire a professional, the key is accuracy to guarantee a smooth, successful roofing project.

