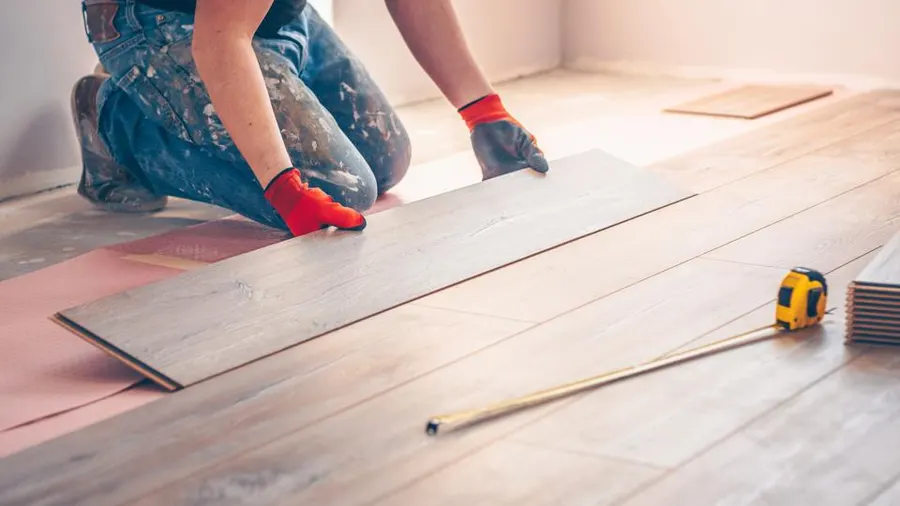
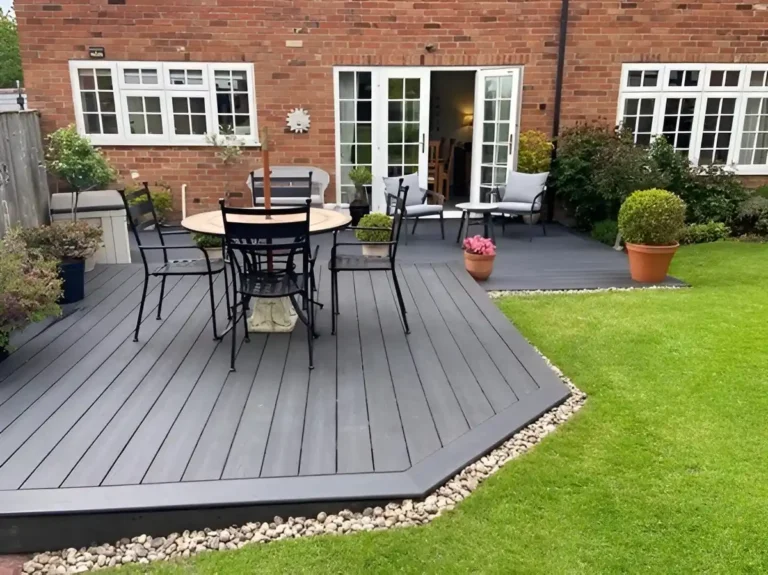
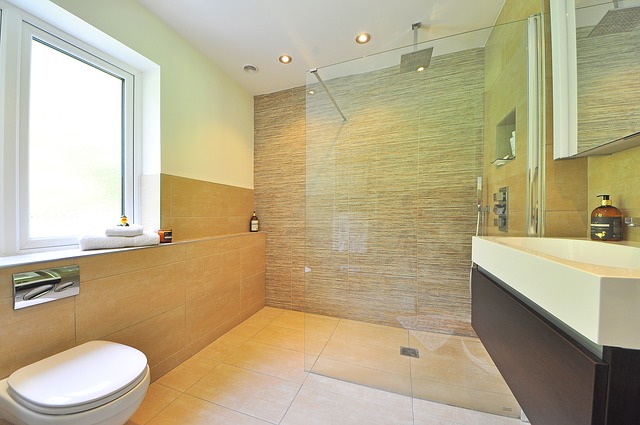
How to Install Tongue and Groove Flooring: A Complete Guide
Installing tongue and groove flooring is a timeless way to enhance the beauty and durability of your home. This versatile flooring option is not only stylish but also designed for easy installation, making it a popular choice for DIY enthusiasts and professionals alike. Whether you’re working on a concrete subfloor, joists, a porch, or even walls, understanding how to install tongue and groove flooring properly ensures a seamless finish that lasts for years. In this guide, we’ll walk you through every step of the process, from preparation to completion, providing expert tips and techniques along the way.
What Is Tongue and Groove Flooring?/
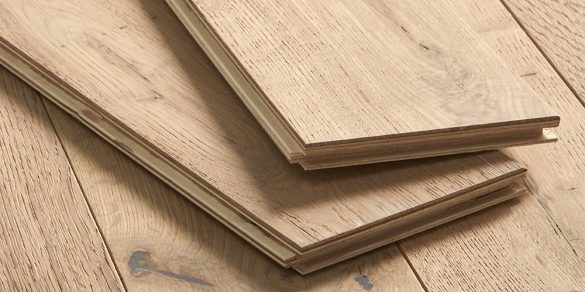
Tongue and groove flooring is a type of wood or laminate flooring where each plank has a tongue (a protruding edge) on one side and a groove (a recessed edge) on the other. This design allows the planks to fit tightly together, creating a seamless and secure connection without the need for visible nails or screws. Popular for its durability and aesthetic appeal, tongue and groove flooring is available in various materials such as hardwood, engineered wood, and vinyl, making it a versatile choice for any home improvement project.
Types of Tongue and Groove Flooring: Which One Is Right for Your Project?
Choosing the right type of tongue and groove flooring depends on your project needs, budget, and aesthetic preferences. Here are the main types to consider:
- Hardwood Tongue and Groove Flooring
Known for its timeless beauty and longevity, hardwood flooring is ideal for living rooms and bedrooms. It adds a classic touch to your home and can be refinished multiple times. - Engineered Wood Tongue and Groove Flooring
Engineered wood offers the beauty of hardwood with added stability. It’s perfect for areas prone to moisture, such as basements and kitchens, due to its layered construction. - Laminate Tongue and Groove Flooring
A cost-effective alternative to hardwood, laminate flooring mimics the look of wood while being resistant to scratches and stains. It’s an excellent choice for high-traffic areas. - Vinyl Tongue and Groove Flooring
Vinyl Plank flooring is water-resistant and low-maintenance, making it suitable for bathrooms, laundry rooms, and even porches. - Floating Tongue and Groove Flooring
This option doesn’t require nails or glue, as the planks lock together and “float” above the subfloor. It’s a convenient choice for DIY installations.
Tongue and Groove Flooring vs. Other Flooring Types: Pros and Cons
When deciding on flooring for your home, it’s important to weigh the advantages and disadvantages of tongue and groove flooring compared to other options.
Pros of Tongue and Groove Flooring
- Seamless Appearance: The tight interlocking system creates a smooth, polished finish.
- Easy Installation: The design simplifies the installation process, even for beginners.
- Durability: Tongue and groove flooring offers excellent longevity, especially when made from high-quality materials.
- Versatility: Available in a variety of materials, it can suit almost any room or style.
Cons of Tongue and Groove Flooring
- Moisture Sensitivity: Hardwood and engineered wood variants may not perform well in extremely humid or wet conditions.
- Repair Challenges: Replacing damaged planks can be tricky due to the interlocking design.
Comparison with Other Flooring Types
- Carpet: While carpet offers comfort, it lacks the durability and sleek look of tongue and groove flooring.
- Tile: Tile is more moisture-resistant, but it doesn’t provide the same warmth or ease of installation.
- Floating Vinyl or Laminate: These options are often more affordable and water-resistant but might not match the elegance of hardwood tongue and groove.
Benefits of Tongue and Groove Flooring
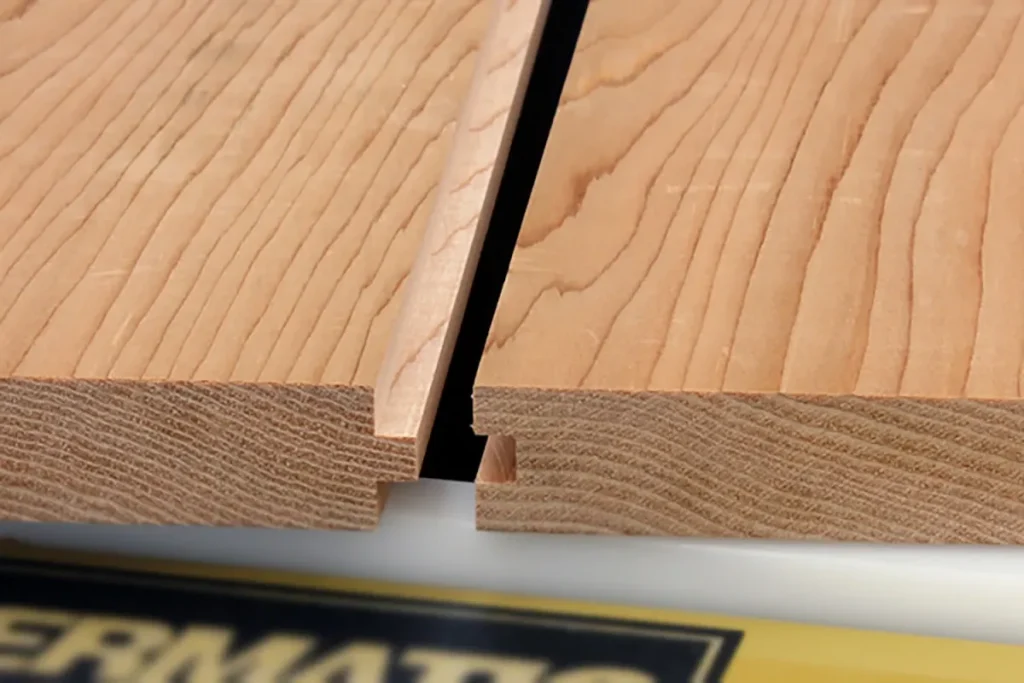
Tongue and groove flooring is renowned for its combination of practicality, durability, and elegance, making it a popular choice for homeowners. This flooring style offers unique advantages that elevate both the functionality and aesthetic appeal of any space.
Why Install Tongue and Groove Flooring in Your Home?
Choosing to install tongue and groove flooring in your home brings numerous benefits:
- Ease of Installation: The interlocking design allows for a straightforward installation process, making it an excellent choice for DIY enthusiasts.
- Versatility: Available in hardwood, engineered wood, laminate, and vinyl, tongue and groove flooring suits a wide variety of applications, from living rooms to porches.
- Cost-Effective: Compared to other flooring types, it provides excellent value for money, particularly with floating tongue and groove flooring installations that require minimal tools and materials.
- Low Maintenance: Regular sweeping and occasional mopping are all you need to maintain its beauty.
Durability and Aesthetic Appeal of Tongue and Groove Flooring
One of the standout features of tongue and groove flooring is its remarkable durability and timeless aesthetic.
- Durability: Its tight interlocking mechanism ensures a sturdy and long-lasting surface that resists shifting and gaps over time. This makes it an ideal choice for high-traffic areas like hallways and kitchens.
- Aesthetic Variety: With options like hardwood and engineered wood, tongue and groove flooring adds natural warmth and elegance to any room. Laminate and vinyl alternatives replicate these looks at a fraction of the cost, offering design flexibility.
- Enhanced Finish: Proper installation ensures a smooth, gap-free appearance, enhancing the overall look of your interior design.
Preparing for Tongue and Groove Flooring Installation
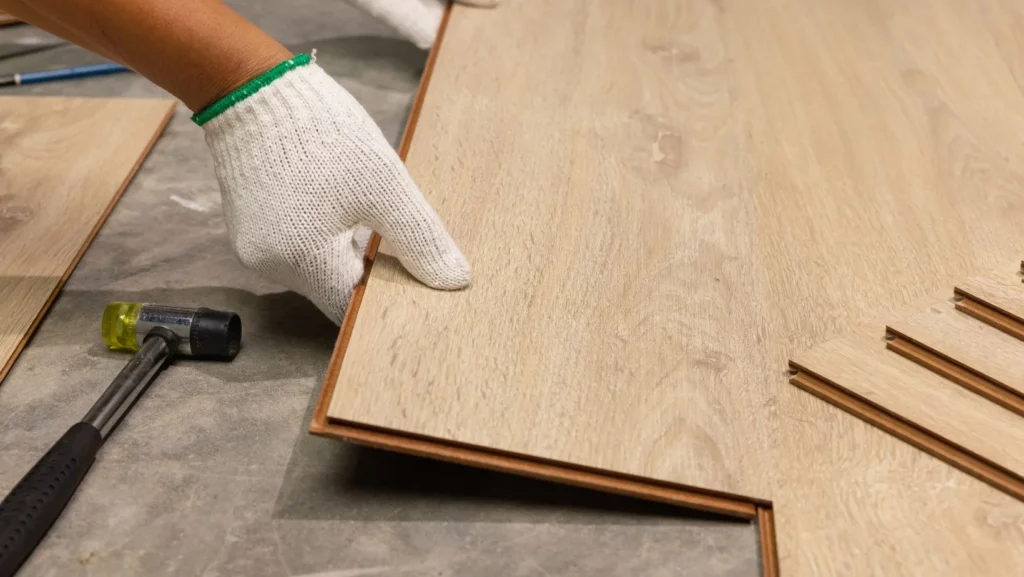
Proper preparation is the foundation of a successful tongue and groove flooring installation. By taking the time to get your materials and space ready, you’ll ensure a smooth process and a flawless finish that lasts for years.
How to Acclimate Tongue and Groove Flooring Before Installation
Acclimating tongue and groove flooring is a crucial step that prevents future issues like warping or buckling. Follow these steps to acclimate your flooring:
- Bring Materials Indoors: Allow the flooring to rest in the installation area for at least 48-72 hours to adapt to the room’s temperature and humidity.
- Spread the Planks: Lay the planks flat and avoid stacking them to ensure even acclimation.
- Monitor Conditions: Maintain a room temperature of 60-80°F and a humidity level of 30-50% during the acclimation process.
Skipping this step can lead to misalignment or gaps in the flooring, especially in areas like porches or concrete subfloors, where temperature and moisture fluctuations are common.
Essential Tools and Materials for Installing Tongue and Groove Flooring
Having the right tools and materials on hand ensures a smooth and efficient installation process. Here’s what you’ll need:
- Tools:
- Tape measure
- Circular saw or jigsaw
- Rubber mallet
- Flooring nailer or stapler
- Pry bar
- Level
- Chalk line
- Materials:
- Tongue and groove flooring planks
- Underlayment (foam, felt, or moisture barrier)
- Nails or adhesive, depending on the installation method
- Spacer wedges
For specific installations, such as over concrete or joists, you may also require additional items like a moisture barrier or specialized adhesive.
Preparing the Subfloor for Tongue and Groove Flooring Installation
A clean, level, and dry subfloor is critical for the success of your installation. Follow these steps to prepare the subfloor:
- Clean the Surface: Remove debris, dust, and grease from the subfloor to ensure proper adhesion and alignment.
- Check for Levelness: Use a level to identify any uneven areas. Sand down high spots and fill low areas with a leveling compound.
- Moisture Testing: For concrete subfloors, conduct a moisture test to ensure levels are within the flooring manufacturer’s guidelines.
- Install Underlayment: Lay the underlayment to provide a smooth surface, reduce noise, and act as a moisture barrier.
By thoroughly preparing the subfloor, you’ll set the stage for a stable, long-lasting tongue and groove flooring installation that performs well over time.
How to Install Tongue and Groove Flooring on Joists
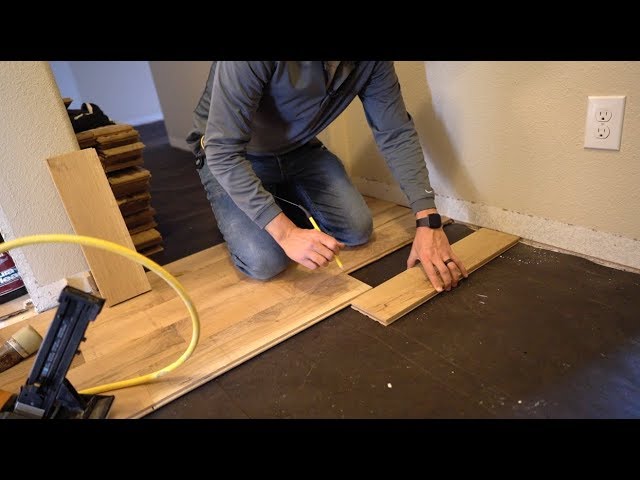
Installing tongue and groove flooring directly on joists is a practical and attractive option, especially for open or rustic interiors. With proper preparation and technique, you can achieve a durable and visually appealing finish.
Step-by-Step Guide for Installing Tongue and Groove Flooring on Joists
Follow these steps to ensure a successful installation:
- Prepare the Joists:
- Ensure the joists are level, secure, and spaced correctly, typically 16 inches apart.
- Apply a moisture barrier if necessary, particularly in areas prone to humidity.
- Lay the First Row:
- Start at one end of the room. Position the groove side against the wall and use spacers to maintain an expansion gap of 1/4 inch.
- Secure the planks by nailing them at an angle through the tongue into the joists.
- Continue with Subsequent Rows:
- Fit the tongue of each new plank into the groove of the previous row. Use a rubber mallet to tap the boards together gently.
- Nail or screw each plank into the joists through the tongue.
- Cut Boards as Needed:
- Use a saw to cut boards to size for edges or corners, ensuring a snug fit.
- Complete the Installation:
- Lay the final row, trimming it if necessary to fit. Secure it by face-nailing the planks and covering the nails with baseboards or molding.
By following these steps, your tongue and groove flooring will rest securely on the joists, offering a sturdy and elegant finish.
Tips for Installing Tongue and Groove Flooring Backwards on Joists
Sometimes, you may need to install tongue and groove flooring in reverse order, especially when starting from a central feature or matching an existing pattern. Here are some tips to handle this challenge:
- Use Splines:
- Insert wooden splines into the grooves of the boards to create a new tongue, allowing you to install planks in reverse.
- Secure Planks Carefully:
- Nail or screw the boards into the joists through the edge, taking care not to damage the flooring.
- Cut Boards Precisely:
- Ensure each plank fits tightly, particularly around edges and obstacles. Use a saw for precision cuts.
- Work Slowly:
- Installing backwards requires extra care to ensure the planks remain flush and properly aligned.
By using these techniques, you can overcome the challenge of reverse installation and achieve a seamless, professional look.
Installing Tongue and Groove Flooring on Concrete
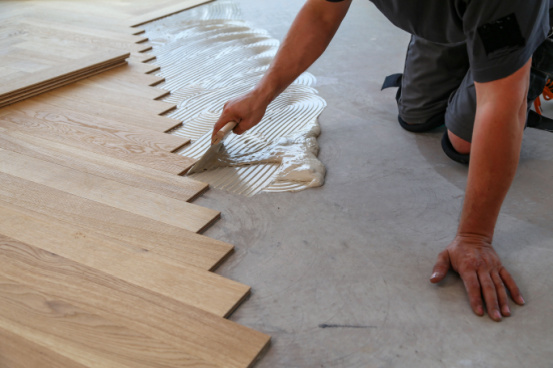
Installing tongue and groove flooring on a concrete base requires careful preparation to ensure durability and a smooth finish. Whether you’re working with engineered wood, laminate, or vinyl, the following guidelines will help you achieve a flawless installation.
How to Install Tongue and Groove Flooring on Concrete Slabs
- Prepare the Concrete Slab:
- Clean the surface thoroughly to remove dirt, grease, and debris.
- Conduct a moisture test to ensure the slab is within acceptable moisture levels for the flooring material.
- Apply a Moisture Barrier:
- Lay a polyethylene sheet or a specialized moisture barrier to prevent dampness from damaging the flooring.
- Overlap the edges of the barrier by a few inches and tape them securely.
- Install Underlayment (If Required):
- Add an underlayment layer for additional cushioning and soundproofing, especially for laminate or engineered wood flooring.
- Lay the First Row:
- Start along the longest wall. Use spacers to maintain an expansion gap of 1/4 inch between the flooring and the wall.
- Position the groove side against the wall and fit the planks together.
- Complete the Installation:
- Continue adding rows, ensuring a tight fit by tapping the planks gently with a rubber mallet.
- Trim the last row to fit snugly against the opposite wall.
Best Practices for Installing Tongue and Groove Flooring on Concrete Subfloors
- Use the Right Tools: Always use a rubber mallet, spacers, and a tapping block to avoid damaging the flooring.
- Maintain Proper Gaps: Expansion gaps are crucial to allow the flooring to expand and contract with temperature changes.
- Check for Levelness: Ensure the concrete subfloor is level. Uneven surfaces can lead to gaps or buckling. Use a leveling compound to fix any irregularities.
- Follow Manufacturer Guidelines: Different flooring materials have specific requirements for installation on concrete, so consult the manufacturer’s instructions.
How to Install Tongue and Groove Flooring on Concrete with Glue
- Prepare the Concrete Surface:
- Ensure the concrete is clean, dry, and level. Remove any old adhesive or paint.
- Apply a primer to the concrete if required by the adhesive manufacturer.
- Choose the Right Adhesive:
- Use a high-quality flooring adhesive designed for your specific flooring type.
- Apply the Adhesive:
- Work in small sections to prevent the adhesive from drying too quickly. Use a trowel to spread the glue evenly across the surface.
- Lay the Flooring:
- Place the planks into the adhesive, starting along one wall.
- Press the planks firmly into place, ensuring they interlock tightly.
- Clean Excess Glue:
- Wipe away any adhesive that squeezes out between the planks immediately with a damp cloth.
- Let It Cure:
- Allow the adhesive to cure fully, following the manufacturer’s recommended drying time before walking on the floor or placing furniture.
Installing tongue and groove flooring on concrete with glue creates a secure and durable bond, making it ideal for high-traffic areas and spaces where floating floors are not suitable.
Floating Tongue and Groove Flooring Installation
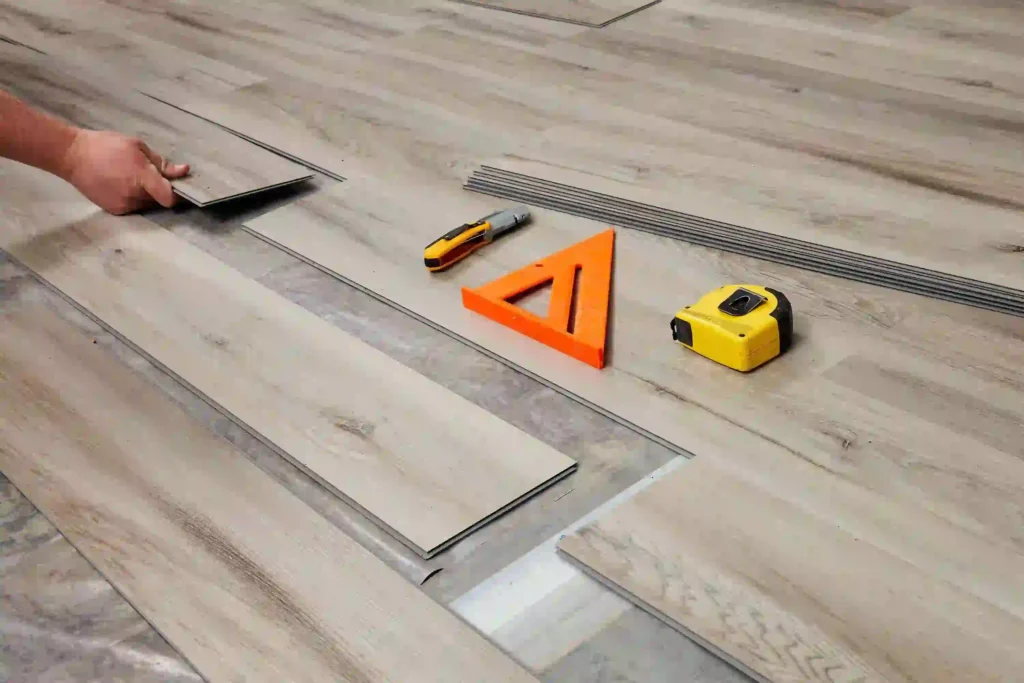
Floating tongue and groove flooring is an excellent option for areas where you want easy installation and flexibility. Unlike traditional nailed-down methods, floating flooring doesn’t require adhesive or nails, as the planks “float” over the subfloor. This makes it ideal for both DIY projects and professionals seeking a fast and efficient solution.
What Is Floating Tongue and Groove Flooring?
Floating tongue and groove flooring refers to a type of installation method where the planks interlock using the tongue and groove system but are not attached directly to the subfloor. Instead, they “float” over an underlayment, which provides additional soundproofing and moisture protection. This system is commonly used with laminate and engineered wood floors, offering a simpler, quicker installation process compared to nailed or glued flooring.
Advantages of Floating Tongue and Groove Flooring:
- Easy Installation: No nails or glue are required, making it faster to install.
- Movable: Since the flooring is not fixed to the subfloor, it can be easily removed or replaced if needed.
- Minimal Maintenance: The floating design allows the floor to expand and contract naturally with temperature and humidity changes, reducing the risk of buckling or gaps.
How to Install Floating Tongue and Groove Flooring Without Nailing
Installing floating tongue and groove flooring without nails is a simple and cost-effective solution. Follow these steps for a smooth and successful installation:
- Prepare the Subfloor:
- Ensure the subfloor is clean, dry, and level. Remove any debris, dust, or nails that could interfere with the installation.
- Lay down an underlayment, such as foam or felt, to provide cushioning and soundproofing.
- Start with the First Row:
- Begin along the longest wall of the room. Use spacers to maintain a small expansion gap between the flooring and the wall (usually 1/4 inch).
- Align the tongue side of the first board against the wall and connect the groove side of the next board to the tongue of the first.
- Continue Installing Rows:
- Work your way across the room, ensuring the boards interlock securely. Tap the boards gently with a rubber mallet if necessary to ensure a tight fit.
- Ensure each row is aligned properly, with no gaps between the boards.
- Cut the Last Row:
- When you reach the final row, measure and cut the planks to fit. Use a saw to trim them to the correct length, leaving a small expansion gap.
- Finish the Installation:
- Once the floor is fully laid, install baseboards or quarter-round molding to cover the expansion gap along the walls.
With floating tongue and groove flooring, you’ll achieve a professional look without the need for nails or glue. The system provides easy installation and is ideal for DIY projects or areas requiring minimal downtime.
How to Install Tongue and Groove Flooring on Porches, Stairs, and Walls
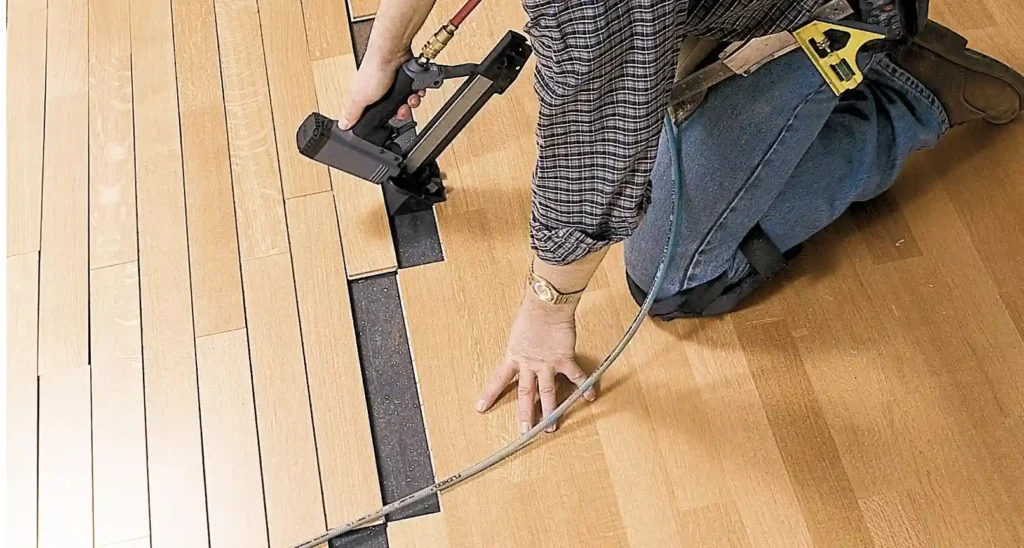
Installing tongue and groove flooring isn’t just for interiors; it can also be used on porches, stairs, and walls, providing a seamless and stylish finish. These areas require specific installation techniques to ensure durability, safety, and aesthetic appeal. Here’s a guide to help you tackle these unique flooring installations.
Step-by-Step Guide to Installing Tongue and Groove Flooring on Stairs
Installing tongue and groove flooring on stairs adds a polished and unified look, but it requires precise measurements and cutting for a secure, smooth fit. Follow these steps:
- Prepare the Stairs:
- Clean the stair treads to remove dirt, dust, or any old finish. Make sure the surface is smooth and level before starting.
- Measure and Cut the Planks:
- Measure the width of the stair treads and cut your tongue and groove planks to fit. Each tread will require a single plank, which may need trimming to match the stair dimensions.
- Install the First Board:
- Position the first plank with the groove facing the edge of the stair tread. Attach it using screws or nails, securing it into place along the edges and through the tongue.
- Fit Additional Boards:
- Slide the tongue of each subsequent plank into the groove of the previous one, ensuring each one fits tightly and securely. Use a rubber mallet to ensure the boards click together smoothly.
- Finish the Edges:
- Once all the planks are in place, trim any excess at the edges and add stair noses or molding to cover the seams for a clean finish.
How to Install Tongue and Groove Flooring on a Porch: A Simple Guide
Installing tongue and groove flooring on a porch requires a durable and weather-resistant solution, as it will be exposed to the elements. Here’s a simple guide to ensure a solid and long-lasting installation:
- Prepare the Porch Surface:
- Clean the surface to ensure it is free of dirt, debris, and moisture. Check for any unevenness and correct it with a leveling compound if necessary.
- Select the Right Flooring:
- Choose outdoor-rated tongue and groove flooring made from materials like pressure-treated wood or composite boards to withstand weather conditions.
- Install a Moisture Barrier:
- Lay down a moisture barrier (e.g., plastic sheeting or a vapor barrier) to protect the flooring from humidity or rain.
- Lay the First Row of Planks:
- Begin by placing the first row of tongue and groove planks along the edge of the porch, ensuring the groove is against the wall or edge. Secure the planks in place using nails or screws, ensuring a tight fit.
- Continue Installing the Planks:
- Fit the subsequent rows, tapping them into place with a rubber mallet. Leave an expansion gap between the planks and the edge of the porch to allow for natural expansion and contraction.
- Finish with Trim:
- Once the entire floor is installed, use trim or baseboard molding to cover the edges and complete the look.
How to Install Tongue and Groove Flooring on Walls: Best Practices
Installing tongue and groove flooring on walls creates a striking visual feature in any room. The process differs slightly from traditional flooring installation, but it’s equally rewarding. Here’s how to do it right:
- Prepare the Wall Surface:
- Clean the wall to remove any dust or debris. If necessary, add a vapor barrier or underlayment to protect against moisture.
- Measure and Mark the Wall:
- Start by measuring the height and width of the wall to determine how many planks you’ll need. Mark a level line along the top edge where the first row will be installed.
- Install the First Row of Planks:
- Start at the bottom of the wall, placing the groove side against the wall and securing the tongue into place with nails or screws. Use a level to ensure the planks are straight.
- Continue Installing the Planks:
- Work your way up the wall, interlocking the tongue and groove of each plank. Use a rubber mallet to fit the planks tightly and ensure there are no gaps between them.
- Trim the Top and Bottom Edges:
- Once all the planks are in place, trim the top and bottom edges of the wall to ensure a neat finish.
- Add Baseboards or Trim:
- For a polished look, add baseboards or trim around the edges to cover any gaps and enhance the overall aesthetic.
By following these steps, you can successfully install tongue and groove flooring on stairs, porches, and walls, creating a stunning and durable finish that complements your home’s style.
Tongue and Groove Flooring Installation Cost

When considering tongue and groove flooring for your home, understanding the installation cost is essential. The price can vary based on factors such as material choice, room size, and whether you’re hiring a professional or handling the installation yourself. This section will give you an overview of what to expect and how to budget for your project.
How Much Does It Cost to Install Tongue and Groove Flooring?
The average cost of installing tongue and groove flooring ranges between $3 to $8 per square foot, depending on the material and installation method. Here’s a breakdown of typical costs:
- Material Costs:
- Wood Flooring: Solid wood or engineered wood tongue and groove planks typically cost between $2 to $6 per square foot. High-quality hardwoods, such as oak or maple, will be on the higher end of this price range.
- Laminate Flooring: Laminate tongue and groove planks are a more affordable option, generally costing $1 to $3 per square foot.
- Labor Costs:
- If you hire a professional to install your flooring, labor costs will add $1 to $3 per square foot. The installation is generally quicker for tongue and groove flooring, which may help reduce overall labor expenses.
- DIY Installation: If you’re tackling the project yourself, you can save significantly on labor costs, but keep in mind that tools and time will be required.
- Additional Costs:
- Underlayment: Some installations may require underlayment, which can add $0.50 to $1 per square foot.
- Finishing Touches: Don’t forget about trim, molding, or baseboards, which can add another $1 to $2 per linear foot.
Overall, the total cost of your project will depend on the size of the area you’re covering, the materials you choose, and whether you go with professional installation or DIY.
Factors That Impact Tongue and Groove Flooring Installation Cost
Several factors can affect the overall cost of installing tongue and groove flooring, including:
- Material Choice:
The type of tongue and groove flooring you select (e.g., solid hardwood, engineered wood, or laminate) plays a significant role in pricing. Hardwood flooring is typically more expensive, while laminate and vinyl options offer budget-friendly alternatives. - Room Size:
The larger the area, the more material and labor will be required. Be sure to measure the space accurately to estimate the total cost. Larger rooms may also require additional underlayment, which can add to the expense. - Subfloor Preparation:
If your existing subfloor is not level or requires repairs, this will increase the overall cost. Proper subfloor preparation is crucial for a long-lasting installation and may involve additional materials and labor. - Installation Complexity:
The complexity of your installation will impact the price. For example, installing tongue and groove flooring on stairs, a porch, or a wall may require more precise measurements, cuts, and labor. The difficulty level can influence labor costs significantly. - Location:
Installation costs can vary depending on where you live. Urban areas may have higher labor rates, while rural areas might offer more affordable options. Additionally, local material availability can affect costs. - Professional vs. DIY Installation:
Hiring a professional to install tongue and groove flooring will incur higher costs for labor, but it can save time and ensure a flawless finish. DIY installation can reduce expenses, but it requires knowledge, experience, and specialized tools to do it correctly.
By understanding these factors, you can better prepare for the total cost of your tongue and groove flooring installation and make informed decisions that suit both your budget and design preferences.
Troubleshooting Common Tongue and Groove Flooring Issues
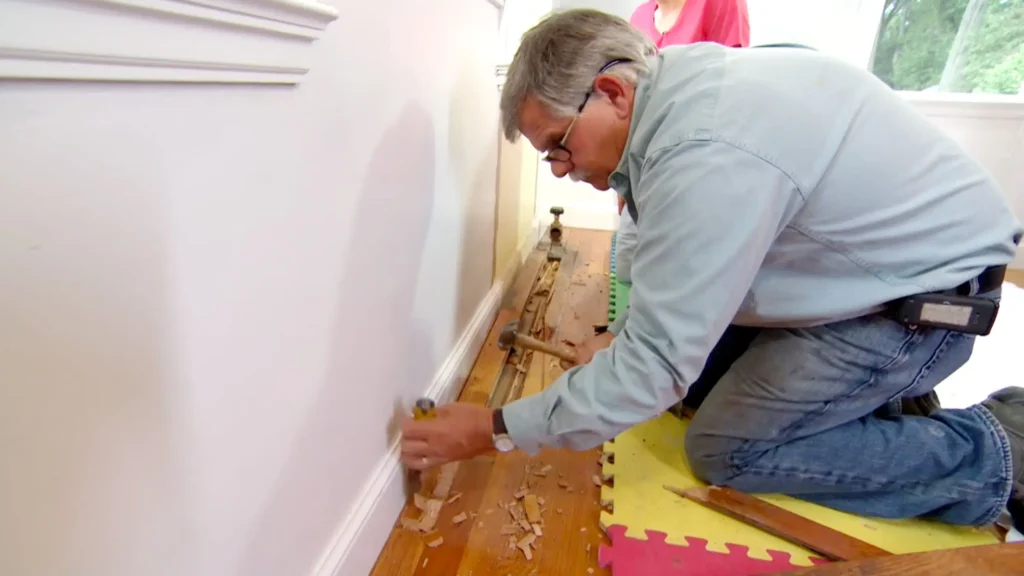
While tongue and groove flooring is a durable and attractive choice, installation can sometimes come with challenges. Whether you’re a DIYer or working with professionals, it’s essential to address issues quickly to ensure your flooring remains in optimal condition. Here’s a guide to troubleshooting common problems you may encounter during installation and their solutions.
How to Fix Gaps in Tongue and Groove Flooring During Installation
Gaps between tongue and groove planks during installation can occur for a variety of reasons, such as humidity changes, improper acclimation, or subfloor irregularities. Here’s how to fix them:
- Acclimate the Flooring Properly:
One of the most common reasons for gaps in tongue and groove flooring is improper acclimation. Always allow the flooring to adjust to the room temperature and humidity for at least 48 to 72 hours before installation. - Use a Flooring Clamp or Pull Bar:
If you notice gaps between planks, use a flooring clamp or pull bar to pull the planks together as you continue the installation. This tool ensures a tight fit and eliminates gaps that might occur when planks aren’t snug against each other. - Check the Subfloor:
An uneven subfloor can cause planks to shift or gap during installation. Before laying your tongue and groove flooring, ensure that the subfloor is clean, level, and free of debris. Sand down high spots and fill in low spots with leveling compound to ensure the planks fit securely. - Consider Adding Additional Adhesive:
If you’re installing tongue and groove flooring with glue, applying extra adhesive along the grooves can help to minimize gaps and improve the fit. Be cautious not to over-apply, as excess adhesive can spill out and make a mess.
Common Problems When Installing Tongue and Groove Flooring and How to Solve Them
- Planks Not Fitting Together Properly:
This problem can arise from improper cutting or incorrect angles when fitting planks. To solve this issue:- Check for Warping or Damage: Inspect the planks before installation to ensure there are no warped, damaged, or defective pieces.
- Proper Cutting and Measuring: When cutting planks, ensure you’re following the manufacturer’s guidelines and using a saw designed for tongue and groove flooring. Always measure twice before cutting to ensure accurate fits.
- Uneven Surface or Floor Height Issues:
Sometimes, the floor may not be level, leading to gaps between planks or uneven height. If this occurs:- Use a Leveling Compound: For minor discrepancies, use a self-leveling compound to create a smooth and even surface.
- Check for High Spots: If the subfloor has high spots, they can cause unevenness. Sand down the high areas to ensure a level surface before proceeding with the installation.
- Noisy Flooring (Creaking or Popping):
After installation, you might notice your tongue and groove flooring creaking or popping, especially if the boards haven’t been secured tightly. To fix this issue:- Secure Loose Planks: Ensure that each plank is fully locked into place by using a flooring nailer or stapler to secure the edges.
- Use Adhesive for Added Stability: For added strength and stability, consider applying glue along the grooves before locking the planks together.
- Flooring Expanding or Contracting After Installation:
Temperature and humidity fluctuations can cause tongue and groove flooring to expand or contract, leading to gaps or buckling. To prevent this:- Leave Expansion Gaps: Always leave a small expansion gap (approximately 1/8 to 1/4 inch) along the edges of the floor and around any obstacles, such as walls or cabinets. This allows for natural expansion and contraction without damaging the flooring.
- Control Room Conditions: Try to maintain a consistent level of humidity and temperature in the room to reduce excessive movement in the flooring.
- Stains or Discoloration:
Staining or discoloration can happen if dust, dirt, or spills are not cleaned up promptly during installation. To avoid this issue:- Keep the Flooring Clean During Installation: Regularly wipe the surface to remove any dust, dirt, or debris that could cause stains.
- Use a Protective Finish: After installation, apply a protective finish to the flooring to prevent staining and enhance its longevity.
By staying vigilant and following these troubleshooting steps, you can ensure a smoother installation process and enjoy the beauty of your tongue and groove flooring for years to come.
Tongue and Groove Flooring Installation: Hard or Easy?
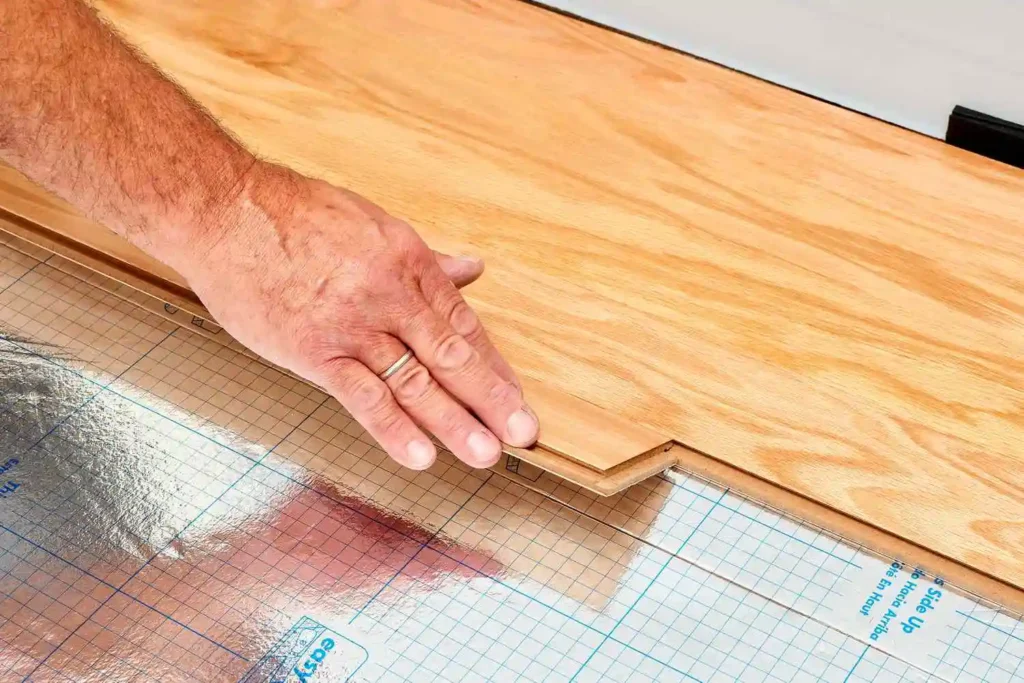
Installing tongue and groove flooring can be both a rewarding and challenging experience, depending on your skill level and the specific installation method you choose. Whether you’re installing it yourself or working with a professional, understanding the complexities and benefits of tongue and groove flooring installation will help you decide if it’s the right choice for your space.
How Hard Is It to Install Tongue and Groove Flooring?
Many homeowners wonder if installing tongue and groove flooring is a task they can tackle on their own. While it’s possible to DIY the installation, it does require some technical know-how, patience, and the right tools. Here’s a breakdown of the installation difficulty:
- Basic Skill Set Required:
For a beginner, tongue and groove flooring installation might seem a bit challenging at first. However, with the right tools and instructions, it becomes easier. You need to know how to measure, cut, and secure the flooring correctly. It’s a task that involves precision but isn’t overly complex once you familiarize yourself with the process. - Tools and Equipment:
Basic tools like a saw, measuring tape, mallet, flooring clamps, and nailer will be required. For the best results, some installations also use a flooring glue for additional stability. You may need to rent or buy specific equipment if you’re not already equipped for such tasks. - Flooring Type Matters:
If you’re installing tongue and groove laminate flooring or vinyl flooring, the installation process can be a bit easier compared to solid wood planks, which require more precise cutting and adjustments. The material’s thickness and installation method play a role in how difficult the project will be. - Time and Patience:
While it’s possible to finish the installation over a weekend, it’s important to factor in the time needed to prepare the subfloor, acclimate the planks, and complete the installation without rushing. Taking your time ensures a smoother outcome and minimizes errors.
How to Lay Tongue and Groove Flooring Like a Professional
If you want to ensure your tongue and groove flooring is installed like a pro, following a few key steps and professional techniques can help you achieve a flawless finish:
- Prepare Your Subfloor Properly:
The key to successful installation starts with a smooth, clean, and level subfloor. Before you begin laying your tongue and groove flooring, inspect the surface thoroughly. Use a leveling compound if needed to correct any imperfections. A well-prepared subfloor creates a stable foundation for your flooring to lock into place. - Acclimate the Flooring:
Ensure your tongue and groove flooring is acclimated to the room’s temperature and humidity before installation. This prevents issues like expansion or contraction after installation. Ideally, leave the planks in the room for 48-72 hours to allow them to adjust. - Start from the Corner and Work Your Way Across the Room:
For the best results, start installing your tongue and groove flooring from the corner of the room. Work your way across the room, using a pull bar to ensure the planks fit tightly together. This technique ensures even spacing and helps maintain a professional-looking floor. - Use a Flooring Nailer for Secure Fit:
To ensure your planks lock in place, use a flooring nailer or stapler for a secure and tight fit. This tool helps eliminate gaps and prevents the flooring from shifting over time. It’s essential for professional-level installation, especially with thicker wood planks. - Finishing Touches:
Once the planks are laid down, focus on the finishing details. Fill any nail holes and install baseboards or trim around the perimeter of the room for a clean, polished look. Additionally, make sure to apply a protective finish, such as a polyurethane coating, to preserve the appearance of your flooring.
By following these tips, you’ll be able to install tongue and groove flooring like a professional, creating a beautiful, durable surface for your home.
Advanced Tongue and Groove Flooring Techniques
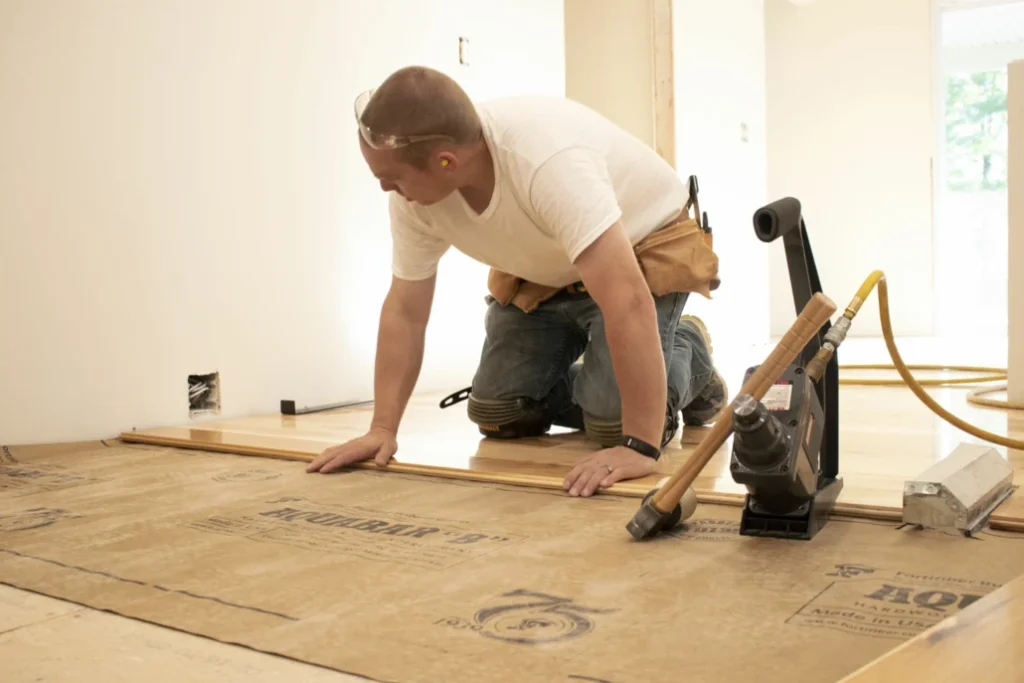
Once you’ve mastered the basics of installing tongue and groove flooring, it’s time to dive into some advanced techniques that can enhance your installation process. These methods can help you achieve an even more durable, efficient, and professional finish. From using glue for additional stability to installing flooring in unique situations like backing the planks, these advanced techniques will take your flooring skills to the next level.
Installing Tongue and Groove Flooring with Glue: A Complete Guide
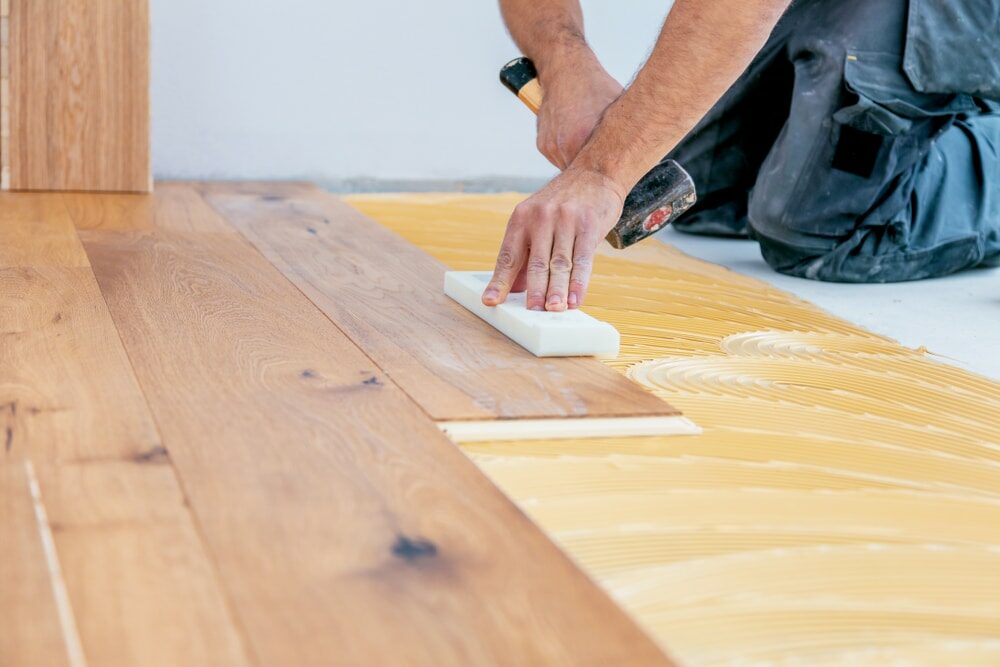
Installing tongue and groove flooring with glue offers a more secure installation, especially when you’re working with concrete slabs or want to ensure the planks stay firmly in place. Here’s how to install your tongue and groove flooring with glue for optimal results:
- Prepare the Subfloor:
Before applying the glue, make sure the subfloor is clean, dry, and level. Any dust or debris can prevent the adhesive from bonding properly. If you’re laying tongue and groove flooring on concrete, it’s also crucial to ensure the concrete is moisture-free. - Select the Right Adhesive:
Choose a high-quality flooring adhesive that’s specifically designed for tongue and groove flooring. The adhesive must be strong enough to hold the planks securely in place while providing flexibility for any expansion and contraction of the wood. - Apply the Adhesive:
Use a trowel to spread a thin layer of glue on the subfloor. Start from the edge of the room and work your way to the opposite wall. Be careful not to apply too much glue, as it could seep out between the planks. - Install the Planks:
After applying the adhesive, immediately begin laying the planks in place, starting from the far corner. Use the tongue-and-groove connection to interlock the planks, pressing them firmly into the adhesive. A rubber mallet can help ensure a tight fit without damaging the edges. - Ensure Tight Seams:
As you continue laying the planks, use a flooring clamp or pull bar to close any gaps between the planks. This ensures the floor is tightly sealed and prevents air pockets or loose planks in the future. - Let the Adhesive Set:
Allow the glue to cure for the recommended time before walking on the floor. Depending on the adhesive, this can take anywhere from 24 to 48 hours.
How to Install Tongue and Groove Flooring Backwards: Tips and Tricks
Installing tongue and groove flooring backwards, or in reverse order, can sometimes be necessary for specific designs or layouts. While the standard method is to work from left to right, installing backwards involves some unique challenges that require a few additional steps. Here’s how to tackle this advanced installation technique:
- Understand the Layout Requirements:
First, make sure the reverse installation is what’s needed for your room layout. Sometimes, installing backwards is necessary to match the direction of the light or to enhance the room’s visual appeal. - Start from the Opposite Corner:
Begin installation at the opposite corner of the room from where you would normally start. Lay the first row as you would normally, but make sure to stagger the joints of the planks for a more natural look. - Use a Flooring Nailer or Stapler:
To ensure the planks are firmly secured, you may need a flooring nailer or stapler for reverse installation. Ensure you apply nails into the tongue part of the plank to avoid visible nails. - Finishing the Edges:
When you install backwards, the final row may need to be cut to fit. Ensure the planks are tightly secured along the wall, and use a pull bar to tightly fit them into place. This step is crucial for maintaining the integrity of the entire installation. - Adapting the Transition Areas:
If your flooring meets another type of material at a transition, such as carpet or tile, you will need to use transition strips to create a smooth, clean edge between the two.
Adjusting for Obstacles and Transitions During Tongue and Groove Flooring Installation
During the installation of tongue and groove flooring, you may encounter obstacles like pipes, vents, or doorways. Navigating these challenges requires careful planning and technique to ensure a seamless look while preserving the integrity of your flooring. Here’s how to adjust for obstacles and transitions:
- Measure and Mark the Obstacle Areas:
Begin by measuring any obstacles, such as pipes, floor vents, or irregular corners. Mark these areas on your planks to make accurate cuts. It’s essential to ensure the flooring fits around the obstacle without leaving gaps or irregular seams. - Use a Jigsaw or Handsaw:
When you need to cut around pipes or other fixtures, use a jigsaw or handsaw for precise cuts. You’ll need to cut the tongue or groove of the plank to fit around these objects, making sure to leave enough room for expansion. - Adjust for Room Transitions:
If your tongue and groove flooring meets another material or room, make sure to use a transition strip to maintain a professional finish. Transition strips are especially important when you’re going from a hardwood floor to tile or carpet, as they create a smooth, level surface. - Leave Room for Expansion:
When dealing with transitions and obstacles, it’s important to leave a small expansion gap (usually around 1/4 inch) between the edge of the planks and any walls or transitions. This space allows the wood to expand and contract with changes in temperature and humidity. - Secure the Edges:
If you encounter doorways or other spaces where the planks need to be secured, use a flooring pull bar to fit the planks tightly into place. This ensures a clean finish without any gaps or unevenness.
By mastering these advanced tongue and groove flooring techniques, you’ll be able to handle more complex installations with ease, achieving a flawless, professional result every time.
Maintenance and Care for Tongue and Groove Flooring
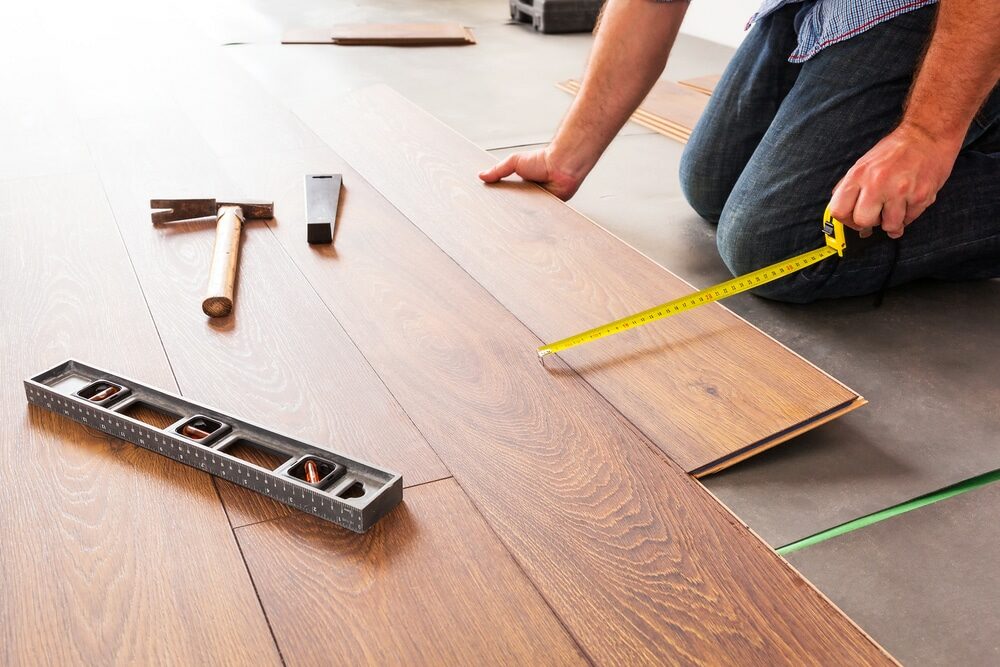
Once you’ve installed your tongue and groove flooring, the key to keeping it looking great for years to come is regular maintenance and proper care. By following a few simple steps and guidelines, you can ensure the longevity of your floor and prevent unnecessary damage. Here’s how to maintain and protect your beautiful tongue and groove flooring:
How to Maintain and Clean Tongue and Groove Flooring for Longevity
Maintaining your tongue and groove flooring involves regular cleaning and occasional upkeep to preserve its appearance and integrity. Here’s how to keep your floor in top shape:
- Sweep or Vacuum Regularly:
Dust, dirt, and debris can scratch the surface of your tongue and groove flooring over time. Use a soft broom or a vacuum with a hardwood floor attachment to clean up these particles. Make sure to avoid harsh bristles or beater bars, as they can cause damage. - Use a Damp Mop:
For deeper cleaning, use a damp mop with a mild, wood-safe cleaner. Be careful not to saturate the floor with water, as moisture can seep into the grooves and potentially cause warping or expansion. Always mop in the direction of the grain to prevent streaks and maintain the finish. - Clean Spills Immediately:
Whether it’s water, food, or other liquids, it’s important to clean spills right away. Prolonged exposure to moisture can damage the floor’s finish and lead to swelling or discoloration. Use a soft cloth or paper towel to blot up any liquids promptly. - Polish the Flooring Occasionally:
To restore the natural shine of your tongue and groove floor, you can use a wood floor polish every few months. Choose a product that’s designed specifically for your floor type, whether it’s engineered wood or solid wood. Polishing will also help fill in small scratches, maintaining a smooth surface. - Avoid Harsh Chemicals:
Avoid using harsh chemicals like ammonia, bleach, or abrasive cleaners on your tongue and groove flooring, as these can strip the finish and damage the wood over time. Stick to pH-neutral cleaners that are safe for hardwood floors.
Preventing Damage to Your Tongue and Groove Flooring
Protecting your tongue and groove flooring from damage is crucial to maintaining its beauty and functionality. Here are some practical tips to prevent wear and tear:
- Use Furniture Pads:
Heavy furniture can leave permanent dents or scratches in your flooring. To prevent this, attach felt pads or rubber protectors to the bottom of furniture legs. This simple step helps reduce friction and prevents marks from appearing on the surface. - Keep High-Traffic Areas Covered:
In areas with heavy foot traffic, consider placing rugs or mats to protect the flooring from dirt and wear. Entrance mats are especially useful in areas where people are coming in with shoes, as they can trap dirt and moisture before it reaches your flooring. - Control Humidity Levels:
Wood is sensitive to changes in humidity, which can cause it to expand or contract. To prevent this, maintain a consistent level of humidity in your home. A humidifier or dehumidifier can help keep the air at optimal levels, especially during the changing seasons. - Avoid Dragging Heavy Items:
Dragging furniture or heavy objects across your tongue and groove flooring can cause scratches and dents. Always lift items when moving them, or use sliders or moving blankets to protect the floor. - Seal the Gaps:
Over time, gaps may appear between the tongue and groove planks, especially in dry conditions. You can use a wood filler or silicone sealant to fill in any noticeable gaps and prevent dirt from accumulating. This will also help maintain the smoothness of the surface and protect the flooring from moisture damage.
By following these maintenance tips, you can ensure that your tongue and groove flooring remains durable, beautiful, and functional for many years, with minimal effort on your part. Regular care and protection are the keys to preserving the long-term quality and appeal of your floor.
Final Thoughts on Installing and Maintaining Tongue and Groove Flooring
Key Takeaways for Installing Tongue and Groove Flooring
- Seamless and Durable: Tongue and groove flooring offers a smooth, attractive finish that’s built to last.
- Versatility: Suitable for various surfaces, including joists, concrete, porches, stairs, and walls.
- Ease of Installation: With proper preparation and tools, you can install it yourself, saving on installation costs.
Steps to Ensure Successful Installation
- Prepare the Subfloor: Clean and level the surface to ensure a strong foundation.
- Acclimate the Flooring: Allow the planks to adjust to the room temperature and humidity before installation.
- Use the Right Tools: Invest in high-quality tools like a saw, hammer, and flooring adhesive for precise and efficient installation.
Maintenance Tips for Longevity
- Regular Cleaning:
- Sweep or vacuum often to remove dirt and debris.
- Mop with a damp cloth to clean spills and stains.
- Preventative Care:
- Use felt pads under furniture to avoid scratches.
- Place mats in high-traffic areas to trap dirt before it reaches the flooring.
- Humidity Control:
- Maintain consistent humidity levels in your home to prevent warping or shrinking.
Benefits of Proper Care
- Increased Durability: Regular maintenance can extend the lifespan of your flooring.
- Sustained Beauty: Prevent scratches, dents, and discoloration to keep your flooring looking like new.
- Easy Upkeep: Simple cleaning habits can go a long way in maintaining the appearance and condition of your tongue and groove flooring.
By following these guidelines, you can ensure that your tongue and groove flooring remains a beautiful, functional feature in your home for years to come. Whether you’re in the installation phase or already enjoying your new floor, keeping up with the care and maintenance will ensure lasting satisfaction with your investment.

